
Last time, I explained why my favorite template material is freezer paper.
This time, I am sharing my best tips for using templates with Inklingo.
These tips are based on my original instructions for using freezer paper templates in Quilted Diamonds (2002 and 2004 with DVD), but some are helpful even if you are using acrylic or other templates, okay?
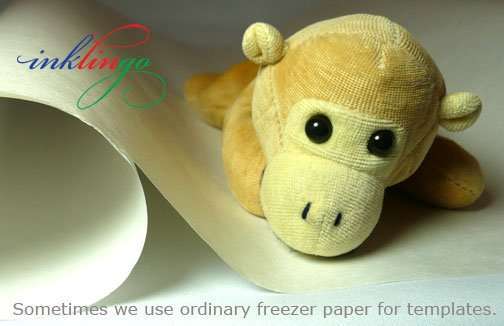
We prefer printing the shapes on fabric, but if we need templates, we use FP.
1. Take the curl out!
If you are using FP on a roll, the curl can be annoying. Some quilters store sheets of FP under books. A faster way is to iron FP to the ironing board cover and peel it off. Quick and easy. It removes the curl and it doesn’t “use it up” because FP can be used over and over again.
2. Trace or print the shapes onto FP.
If your printer doesn’t feed light-weight FP sheets well, you can iron the leading edge to a sheet of regular paper (just the first 0.25 inch or so) and feed the two layers through together. With the right amount of heat (no steam), the FP will peel off neatly after printing.
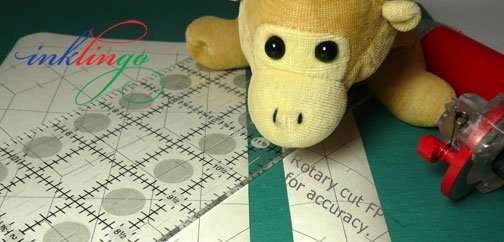
3. Rotary cut the freezer paper.
There is no measuring, so you can use any acrylic ruler as a straight edge. Cut several layers at a time if you need lots of templates. You might want to designate one cutter just for cutting paper. (I use the same one I use for cutting fabric.)
IMPORTANT Use a sharp blade in your rotary cutter because it is safer! When a blade gets dull and you press harder, it is more likely that you will lose control.
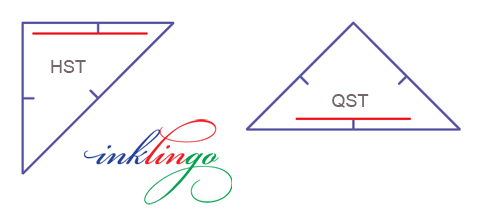
4. Mark straight grain on each template.
Review the instructions and the layouts in the shape collection to see how to position templates for correct straight grain.
Whenever possible, there should be straight grain on the outside edges of a block.
For example, if this triangle will be used on the four corners of a block, be sure you have straight grain on the two short sides (half square triangles, HST above), not the long side (quarter square triangles, QST above).
5. Pre-cut strips of fabric to the right size.
If you are cutting several of one shape, like squares or hexagons, it is efficient to cut the fabric into strips first.
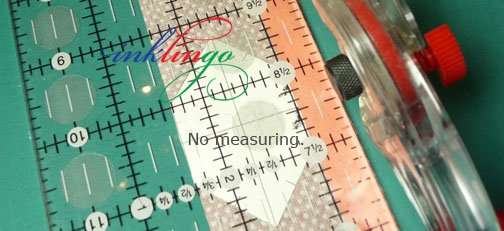
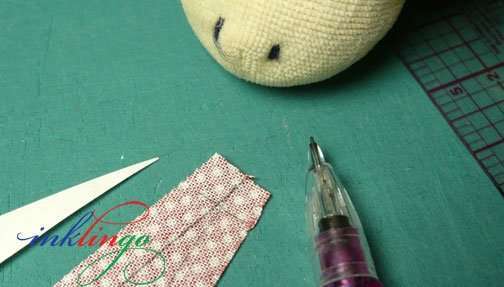
A 0.5-inch-wide strip of colored paper is a handy tool. It allows for two 0.25-inch seam allowances.
You can determine the correct width without measuring or math. Just position the template with correct straight grain and allow for two seam allowances (the width of the orange paper), as shown.
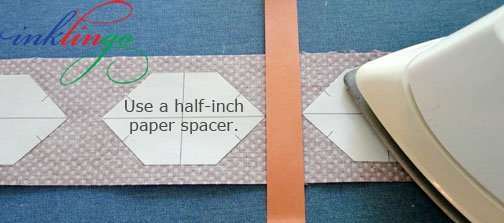
6. Space the templates exactly 0.5 inches apart.
Accurate spacing saves fabric and eliminates extra cuts.
Press the templates in position on the wrong side of the fabric with a hot, dry iron. The plastic-coated side of the FP sticks to the fabric with a temporary bond.
With the right amount of heat, the templates will stick securely but still peel off easily enough to be used over and over and over again.
Other templates slip and slide. Gotta love freezer paper!

7. Add the 0.25-inch seam allowance when you rotary cut.
There is no need to draw the cutting lines whether you use a rotary cutter or scissors.
If you cut with scissors, you can cut accurately enough by “rock of eye” without a line.
8. Mark the lightest, finest line possible.
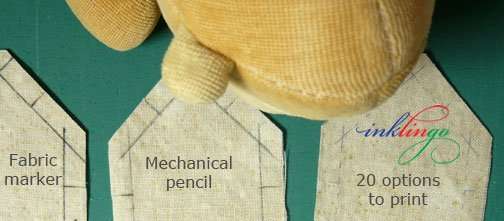
Choosing the right marker is important! These examples show a dramatic difference.
You want the lightest, finest line you can see. Use the ultra-fine lines printed by Inklingo as your goal (above).
Use a mechanical pencil and a light touch to mark the stitching lines.
Pencils make a wider line than Inklingo, so you will need to concentrate when you are sewing. Avoid markers which create a heavy line. It more difficult to sew accurately and it leaves more ink in the quilt than Inklingo does, too.
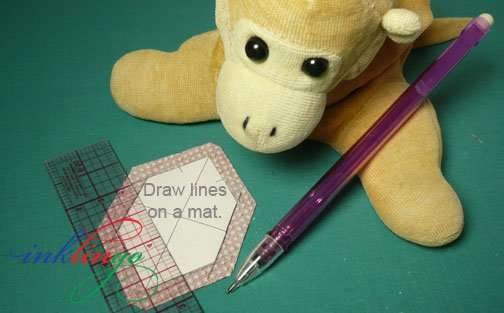
9. Leave the shapes on your cutting mat when you draw the lines.
If the fabric drags under the pencil, it reduces accuracy and loosens the freezer paper from the fabric. It is easier to draw the seam lines with the fabric lying on the cutting mat or on a very fine sandpaper surface.
Leave the FP on the fabric until the lines have been drawn.
Use a ruler as a straight edge when you are marking the lines. A thin, flexible ruler is best. An acrylic ruler casts a shadow and makes it difficult to see. Just use your acrylic ruler for rotary cutting, not for marking the sewing lines.
Don’t store your favorite sunglasses anywhere near a sandpaper surface, okay?
NOTE: If you are machine piecing and you have cut accurate 0.25-inch seam allowances, you don’t have to mark these lines at all unless you want to.
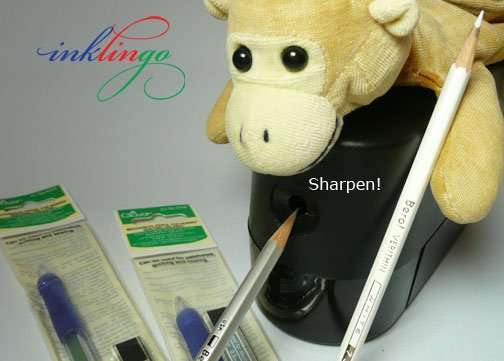
10. Use other markers for dark fabric.
Try white or silver pencils like Berol Verithin (and a really good sharpener) or a mechanical pencil with white or yellow lead, like these from Clover.
You might be surprised by how easy it is to print dark fabric with Inklingo because there is a choice of 20 line weights/colors. See the Top Ten Tutes.
NICE TO HAVE Good lighting and a rotating mat are helpful when you are marking lines and rotary cutting. Even if you don’t normally need reading glasses, you might find them helpful if the lighting is less than perfect.
11. Extend the pencil lines beyond the freezer paper for crosshairs.
The crosshairs make everything easy. With crosshairs, you know where to pin and where to start and stop sewing, especially for inset seams or any time you are hand sewing. (Of course you can sew these shapes by machine if you prefer.)
On very sharp points mark a third line across the first two at the point of the freezer paper above). Mark the matches too when you are drawing the seam lines, especially on long seams (#8 above).
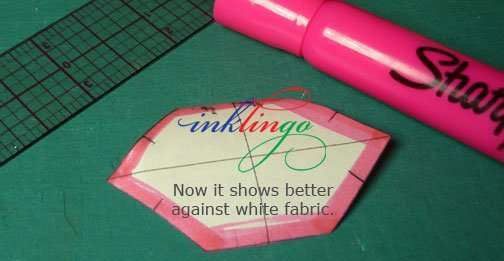
12. Make the FP contrast with the fabric, if necessary.
If it is hard to see the edge of a white FP template against a light or white fabric, run a highlighter around the edge first to make it easier to see.

13. Nest shapes to use fabric efficiently.
When you are positioning the FP for several different shapes on the same fabric, you will want to nest the shapes to avoid waste. Review the Inklingo Combo layouts in the shape collection for ideas.
For example, there are 7 different combo layouts in each of the three Inklingo Castle Wall shape collections.
14. Trim dog ears.
Review the Inklingo layouts with seam allowances to see how to trim dog ears. When you print Inklingo shapes on fabric they have precision corners (above).
You can print Inklingo shapes with seam allowances on paper to create a trimming guide. If you don’t buy fiddly extra acrylic tools, you’ll have more money to buy fabric and chocolate ice cream.
15. Make notes on your templates!
One of the lovely things about FP templates is that you can write on them.
- straight grain
- which fabric to use
- numbers for sewing sequence
- which side is “up”?
- pattern name
- haiku and other poems?
- date?
A few notes are worthwhile, especially since FP templates can be used over and over again.

16. Store your templates in glassine envelopes.
Stamp collectors commonly use glassines, so you should be able to find them in any hobby shop. I still have all of my templates from Quilted Diamonds, Quilted Diamonds 2, and even Dear Jane!
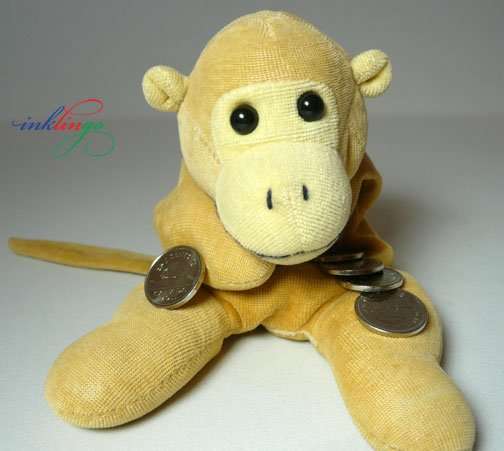
MONKEY’S BONUS TIP
Switching from Inklingo to templates and back again can be confusing because sometimes we iron the freezer paper to the right side of the fabric (so we can print on the wrong side with Inklingo) and sometimes we iron the freezer paper to the wrong side of the fabric (so we can draw the stitching lines manually).
In the early days when I was switching from Quilted Diamonds to Inklingo I had to pay Monkey a nickel every time I did it wrong.

MY BONUS TIP
Print the shapes on fabric whenever you can!
MIX IT UP!
You can use the shapes you make with templates with the ones you print with Inklingo.
Whether you print the shapes on fabric with Inklingo or use templates, always sew a scant 0.25-inch seam allowance by machine or by hand.
SEWING & PRESSING INSTRUCTIONS & DESIGN NOTES
Complete instructions for printing, sewing and pressing are provided for all Inklingo shape collections. They are usually included in the shape collection itself, but there are some special cases.
For example, all of the instructions for Bonnie Hunter’s Celtic Solstice shape collection are on the blog instead of in the shape collection. Mysteries are a special situation.
The instructions for Castle Wall are on the All About Inklingo blog.
TEMPLATES FOR DESIGNERS
Inklingo shape collections make good business sense for designers.
If your favorite designer usually offers acrylic templates, you can suggest a shape collection from Inklingo as another option.
WANT MORE?
There is more about using freezer paper in The Inklingo Handbook. One of our best Freezer Paper tips is in the first chapter—page H41 of the free Diamond-Triangle-Square shape collection.
There are two articles with tips for fussy cutting with FP templates too.
- on QuiltingHub – Crazy About Hexagons
- on All About Inklingo – I Spy Quilts
SUBSCRIBED?
I think you can tell how much I love freezer paper compared to other template materials! I did not intend this to be such a long post. I hope you find these tips useful.
Thank you for visiting.
Linda & Monkey

25 Signs YOU are an Inklingo Quilter

The half inch spacing strip is a wonderful idea – you’re a genius, Monkey! (And you too, Linda, obviously!)
Yes, I could write poetry on a template. If I was ever going to use them again…
But I’m NOT. We can make a gazillion quilts already with Inklingo shapes printed directly onto fabric! If I can’t make it with Inklingo, I will just make something else (OR… request the necessary shape collection! 😉
TEMPLATE VERSE
I find marking so boring and slow
That with tracing each template
I’m growing more desperate
Oh, how many more to go?
I want to just Print, Cut and SEW!!