
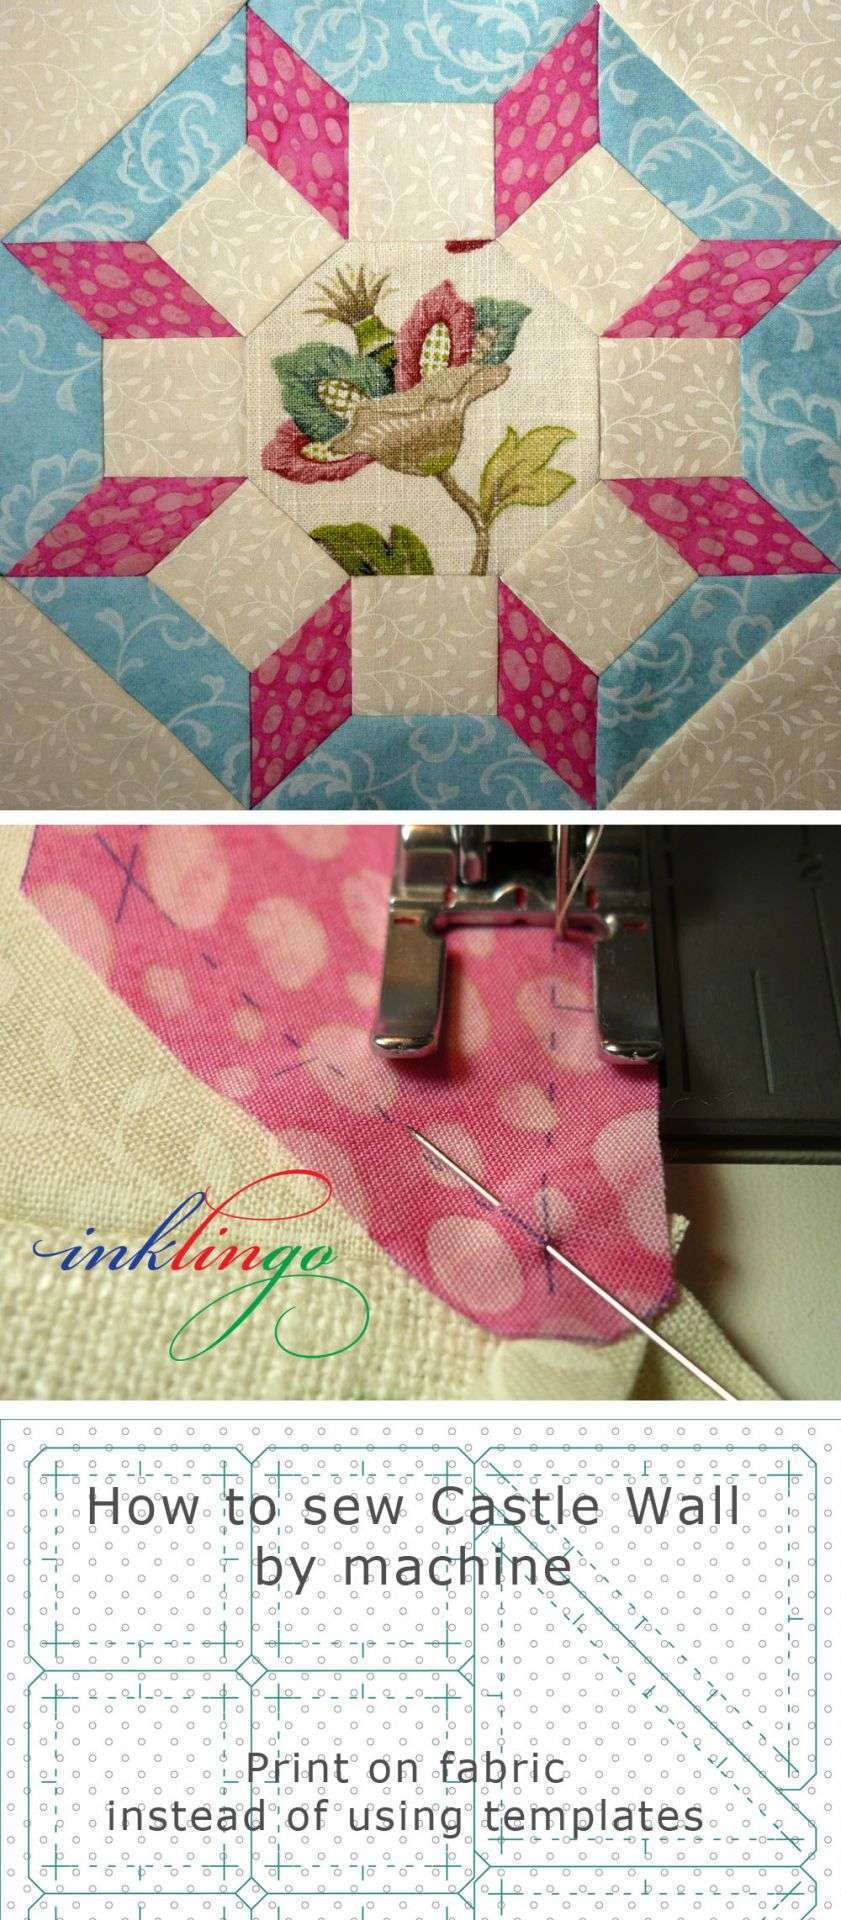
I couldn’t resist.
I wanted to try sewing Castle Wall by machine.
It is one formidable fortress of inset seams! Could I do it?
YES!
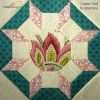
Isn’t it pretty?
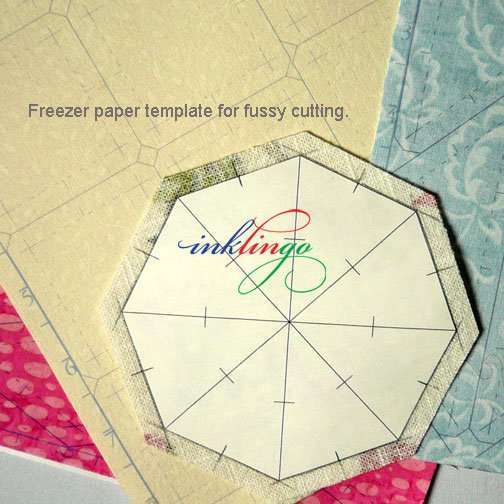
I fell in love with this drapery fabric. It is a little bit heavier than normal quilting cotton. Who could resist the colors and the movement in it? Not me.
The designs are big. I printed on scrap paper with Castle Wall 9 inch to make a window template, so I could preview the flowers. Some of them are small enough for the octagon.
FUSSY CUTTING
There are two Inklingo fussy cutting methods.
1. No Waste Fussy Cutting
I only have about 1.5 yards (two repeats of the design), and there is quite a bit of empty space (plain background), so this fabric is not suitable for the “no waste” method.
2. Traditional Fussy Cutting with Templates
This is the method that makes Swiss cheese of the fabric. It is more work and it is wasteful but it is worth it sometimes.
I printed the Inklingo octagon with no seam allowances on freezer paper to make the template, ironed it in position on the wrong side of the fabric (with a little help from my window template), added the seam allowances when I rotary cut, and drew the lines with a mechanical pencil. (Template tips.)
I prefer to print all of the shapes, but I can combine shapes with pencil lines with the shapes I print.
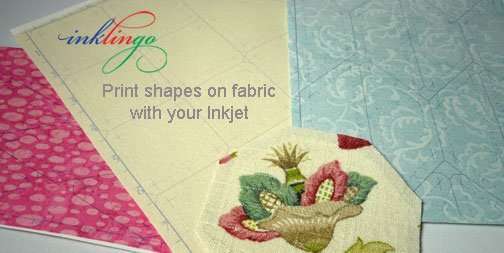
I printed three sheets of fabric using Inklingo Castle Wall 9 inch and Custom Page Sizes, using the info in the shape collection.
- Cream background, Combo 2 (HST and Squares) — 7.75 x 9 inches
- Pink Diamonds, Layout D — 4.75 x 10.5
- Blue Trapezoids, Layout 1 — 7 x 8.25
I just used scraps and I did not use my favorite flower because I wasn’t sure I would love the results by machine. This was just supposed to be a test.
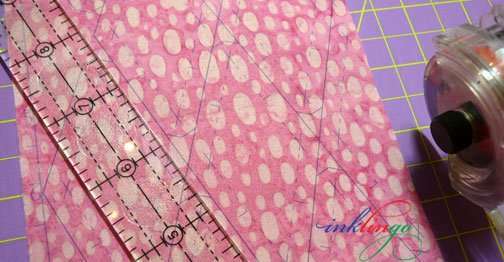
CUTTING
Rotary cut rows, stack the rows and cut 4 layers at a time.
No measuring or special templates. Fast.
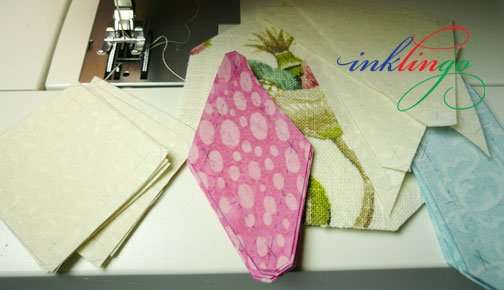
Ready to sew!
The fussy cutting took the longest, but I think it is time well spent. (Time with fabric is always well spent, isn’t it?)
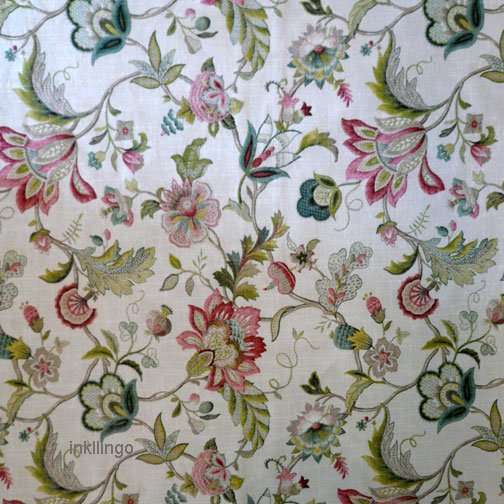
PINNING AND SEWING
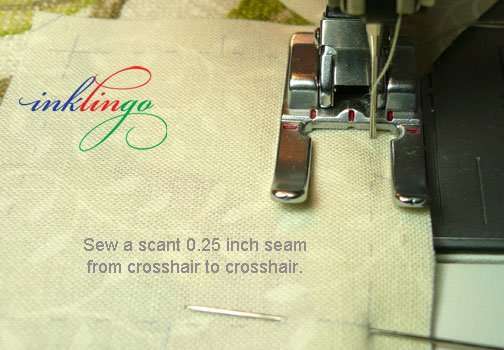
I pin at the beginning and end of the seam and sew from crosshair to crosshair, taking one backstitch at the beginning and end of each seam. (Video below)

I thought the intersection where a diamond meets the octagon and two squares might be tricky but I sewed toward the octagon and finger pressed the other seam allowances out of the way—and it worked perfectly!
I used the same sewing sequence as for hand pieced Castle Wall blocks, illustrated here.
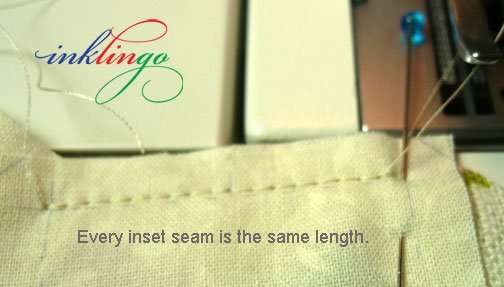
All of the seams are the same length, and the default stitch length fit well. (Notice that I sew beside the line for a scant 0.25 inch seam allowance.)
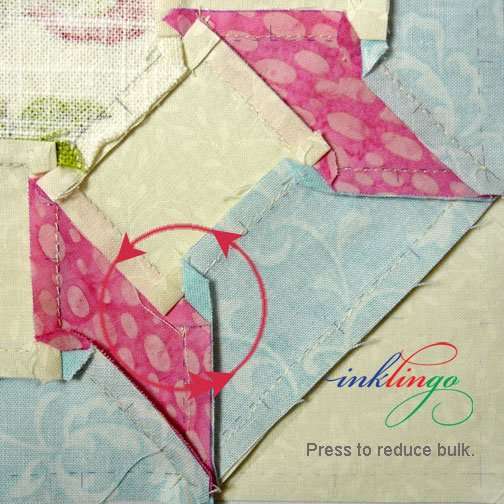
PRESSING
Since I only sewed through two layers and NOT through the crossing seam allowances, I was able to leave all of the pressing to the end, just the way I do when I hand piece.
I used the same pressing method as for hand pieced Castle Wall blocks.
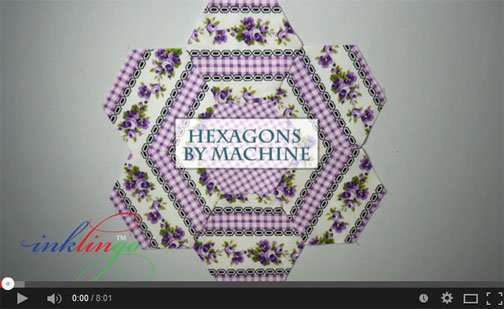
VIDEO
This video shows all of my best tips for machine piecing from crosshair to crosshair. The example uses hexagons but it is exactly the same for Castle Wall.
The video is on YouTube and on the Main Hexagon Page on the website (under the Shop tab).
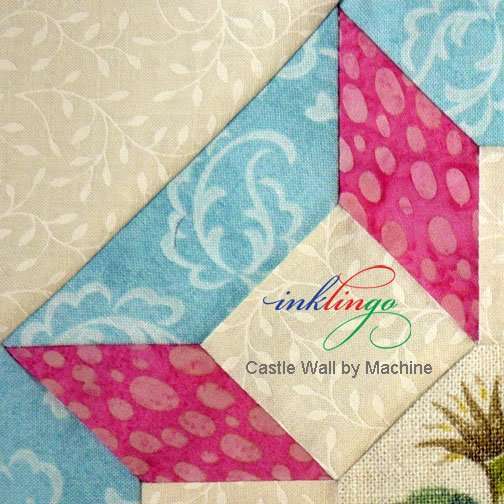
I think my results by machine are just as good as they would have been by hand and it was fast!
The block is exactly 9.5 x 9.5 inches (9 inches finished), so my scant 0.25 inch seam allowances worked.
The precision corners and precise sewing lines printed with Inklingo made all the difference. It surprised me how well it worked.
I don’t think the results would have been as good if I had drawn all of the lines manually.
I could not have done it at all without precise crosshairs on the fabric to mark exactly where to start and stop stitching.
MORE CASTLE WALL LESSONS
I have added “How to Machine Piece Castle Wall” to the list of lessons on the Main Castle Wall Page.
“Attacking a Castle Wall” by machine was a great adventure. I hope you will enjoy it as much as I did.
Thank you for visiting.
Linda & Monkey


Get Notifications!!!!!!
Lovely and for those that have the ability to machine embroider (or by hand) that middle spot would be a great place for an embroidered motif as well.
I understand the temptation home decor fabric can be, plus combine it with my thrift store’s great pricing and I have a lovely big chunk of fabric with all sorts of interesting motifs. Seeing how yours works out makes me have the courage to know it will work out if I want to combine it with quilting cotton.
This was fascinating and it turned out beautifully! Thanks for sharing your process with us.
Hi Janet, I’m glad you like it. 🙂 It is called Castle Wall and there is detailed info at this link:
http://www.inklingo.com/shop/castle-wall/35
If you have any other questions, please ask. I always answer as quickly as possible and I am happy to help.
Hugs, Linda & Monkey in Canada
This is so gorgeous. Is there s pattern for this. I love it.. thanks for sharing.
Hello Linda and Monkey,
This is great, your seams are just perfect! I may give it a try, but I do love to sew by hand so well see.
The drapery fabric is beautiful and I for one would not have
resisted buying it for sure.
superbes,vos travaux;un regret: qu’il n’y ait pas de traduction; bonne journée,amities
Enjoyed your video.
Thank you.
This is Genius! And I love the little “crown” on your flower in the middle of the castle!
<3 <3 <3
Just wanted to tell you how beautiful your castle wall block came out! I love it! The colors are fantastic!