
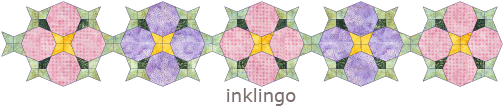
A quilting friend requested a smaller version of the Inklingo Periwinkle Quilt for a wall hanging . . .
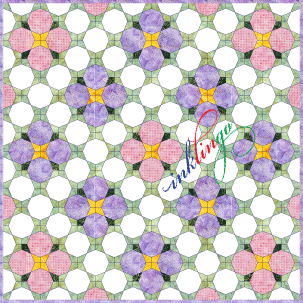
. . . so we designed Wall Flowers, approximately 39 x 39 inches.
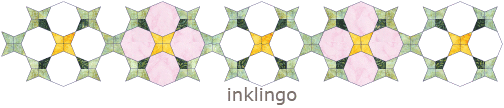
An overall design like the IPQ quilt looks complicated because the “blocks” are not easy-to-identify squares.
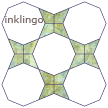
Do you see this block?
. . . .There are 12 of them!
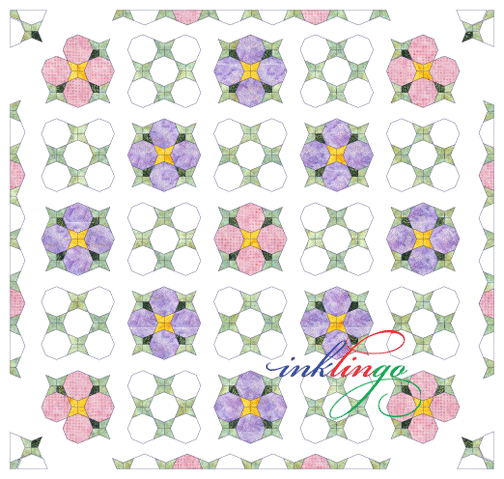
When we break it apart it makes sense. Beautiful!
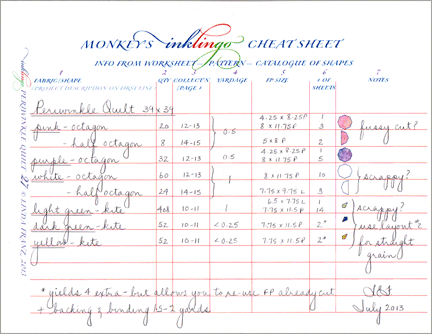
We prepared a Cheat Sheet for Wall Flowers for you (download Part 5 below), but now that you know this powerful little secret, you can design a Periwinkle Quilt too.
- Use the worksheets or the free EQ project file to perfect your color scheme.
- Count the “blocks” and shapes.
- Look up the Suggested Custom Page Sizes in the Periwinkle Octagon Shape Collection.
- Record everything on Monkey’s Cheat Sheet.
Then you can print, cut & sew!
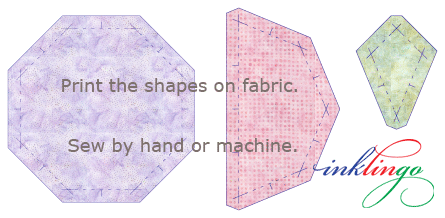
MACHINE AND HAND PIECING (HYBRID)
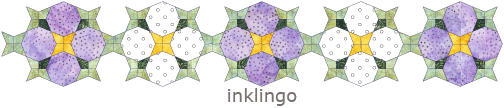
There are only 3 shapes in this quilt. Print them on fabric and you’re ready to “do the Inklingo!”
The Periwinkle design breaks down into perfect sections for a combination of machine piecing AND hand piecing. We call it an Inklingo hybrid.
When you have lines on the fabric you can combine hand and machine piecing and that makes it possible to finish in less time than with any other method.
I like to get a fast start by sewing four-patches by machine. Of course, all of the shapes are fun to sew by hand if you need a portable project.
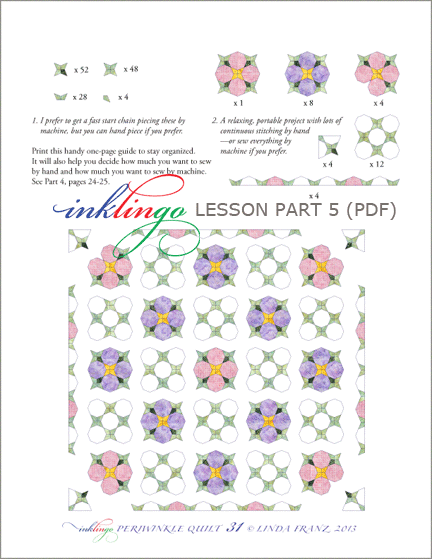
We prepared this one-page guide to help you stay organized whether you are sewing by hand or by machine or a little of both. (Download PDF below.)
The parts are so pretty and so much fun to sew that we know you will actually finish.

3 options!
- machine piece everything by sewing from crosshair to crosshair
- hybrid—machine piece the kites (leaves), hand piece the octagons
(my choice) - hand piece everything with lots of continuous stitching and portability
![]() Blog Badge (right sidebar)
Blog Badge (right sidebar)
The Inklingo Periwinkle Quilt was dubbed a “reverse mystery” because you know in advance what you are making but the format is similar to our mystery quilt (COTSG), the Case of the Secret Garden.
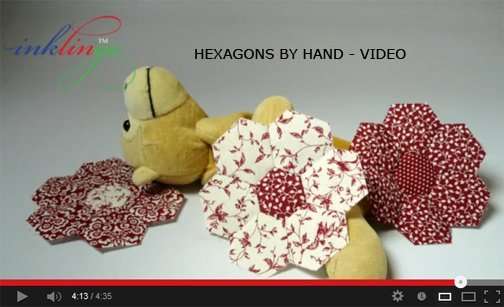
HAND
This video shows how to sew continuously from one seam to the next with hexagons.
There are even more options for continuous stitching with octagons!
Of course, you can sew all of the insets by machine, and the video on YouTube for machine piecing hexagons works for octagons too.
DOWNLOAD PART 5 NOW
The Inklingo Periwinkle Quilt Part 5
Free PDF (7 pages, 5 MB)
The page numbers start at 26 because Part 4 ended with page 25.
(There is a note about downloading with Firefox in Part 3.)
Inklingo Periwinkle Quilt (IPQ) Lesson Summary
- Introduction
- Part 1
- Part 2
- Part 3 (includes EQ project files)
- Part 4 (includes video)
- Inklingo Periwinkle Octagon shape collection
- Hexagon Quilt Design Book
(free with the Periwinkle Octagon shape collection)
Designing and sewing with octagons is similar to designing and sewing with hexagons, so when you buy this new shape collection I will add the Hexagon Quilt Design Book (70 pages, PDF), a $20 value!
Are you subscribed?
If you don’t want to miss anything, you can enter your email address (top of right sidebar). Be the first to sew!
If you know quilters who are looking for an introduction to Inklingo, please let them know about the IPQ lessons. You can have the best of both worlds with Inklingo!
We think octagons are a nice change from hexagons. How about you?
Linda & Monkey

New to Inklingo? Order and download free shapes and start sewing in the next few minutes. Quick Start (Always FREE.) There are triangles, diamonds, and squares in the free collection—great for dozens of different blocks.
$10 Coupon! 7 Year Anniversary Special on the handbook

Lynn’s happy comment makes me sad… If she feels using Inklingo, by printing the shapes on freezer paper, opened up a whole new world to her, then imagine what it would be like if she would try printing directly onto fabric! That is sooooo much easier and quicker.
If you only have a laser printer, it is well worth getting a cheap little inkjet printer, and hooking that up to the computer as an extra printer. If you already have an inkjet printer, there is no reason it can’t be used for printing on fabric stabilized by freezer paper.
Thanks Linda for the updated size. I started one on my own and will email you a picture for the blog when it is together. The other quilt I will start is your Rainbow Flower quilt. I had pretty much given up on quilting, until I found your new invention. I piece only by hand and my pieces were not always acute and it was frustrating. Now I have a whole new world. I use your Inklingo, but print onto freezer paper sheets, cut everything out and use partial freezer templates to stitch around the fabric. Its so accurate and my Periwinkle quilt is perfect. Even my husband noticed the difference. I can only find 8 1/2 by 11 sheets of freezer paper, I will have to investigate a bigger size soon. My printer can’t print on fabric, but this is working out just fine. Thanks for opening up a new world for me.
Great tut. Thanks for the layout. I went to EQ when you gave us the project file and played with some smaller layouts. It is a cute design — I just need to get time to make one up. :o)
Thanks again!