
I love my finger pincushions. They’re dainty and indispensable.

Machine or Hand
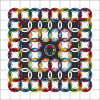
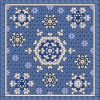
These are great for machine piecers (left), and hand piecing snobs (right).

They even work for lefties!
I wear a finger pincushion when I am machine piecing, when I am hand piecing, and sometimes when I am not sewing at all. (Ooops!)
If you forget to take one off when you leave the house, Monkey says you should try to wear one that matches your outfit.
They are fun to make, so there’s no excuse not having one to match.
There are written instructions in a few Inklingo Shape Collections, but they are so simple you can probably just watch the movie (70 seconds).

1 minute how-to
What I used:
- scraps of cotton fabric
- Inklingo Circles – printed 1.5 inch circles on fabric (named with the finished size)
- rotary cutter and mat (Use scissors if you prefer.)
- quilting thread for a running stitch to gather the circles
- finger-sized spool of thread
- scraps of batting (Silk is v v nice.)
- 1/8 inch elastic
- tweezers to coax the elastic through little holes
- a bit of patience (see above)
- big buttons
- glue gun and hot glue
Russ listened to the William Tell Overture over and over again. (Licensed from Unique Tracks) It’s okay because he laughed when he saw the final result.
We have written about circles before, here.

You could WIN
Leave a comment before Tuesday March 6 to be in a drawing for one of my pincushions, okay? If you don’t win, you can make lots of finger pincushions for yourself and for friends anyway.
This was not on the official To Do list, but it was a nice break. Can you tell I was having fun?
We’ll be back soon with more about the winners in the EQ/Inklingo Love the Lines Contest too. Thanks for visiting.
Linda & Monkey

New to Inklingo? Order and download free shapes and start sewing in the next few minutes. Quick Start (Always FREE.) There are triangles, diamonds, and squares in the free collection—great for dozens of different blocks.
Thanks for the tute! Love these cuties. 😉
Love those! I’m gonna make me one. Thanks for the video tutorial.
Love the funny, short, well-designed video! I’m planning on making these for the quilters at the Library bee. Grateful thanks to you and Monkey!
Thanks for the video. I was just trying to figure out the easiest way to make one when I saw your blog. I had two but can’t find them. This is easy enough I am going to make one for each of the projects I am working on so I won’t have to try to remember when I last had them. This getting old definitely makes life interesting.
Thanks for the tutorial, I’ll get busy making some, but I sure hope I win one of yours. Blessings, M
That is just the cutest thing and really useful,
Gill
You constantly capture my attention with the unique gift you have for simplifying the complexities of quilting to where I can just relax and and take it all in my stride..I am very grateful, thanks for that and I love this little ring too.
Quilt Obsession, this is the link I was brought to from Lindas blog, to leave my comment, couldnt find any other one…
Patti
I have made these finger pincushions for a long time. I use a bottle cap and drill two holes and thread the elastic thru and top with a stuffed circle. They made great little gifts for friendship groups.
Oh my goodness, they are adorable! And you make it look so easy to make..thank you so much. I’m being selfish,but hope I win….Sharon
Wouldnt have thought they were that easy to make. I’m now thinking of making some for some friends. Thank you
Monkey does it again…with a little help from Linda, of course….now off to make my own….
Love the video — especially the music!! I would like to put in my bid for a left-handed version (that fits on the right forefinger or thumb) — then I could wear it while using my left-handed needle and thread. This reminds me that when I was little, of course I had to learn to use right-handed scissors (and, yes,there is a difference), with my left hand — that’s how left-handed I am!! So when I graduated from college I vowed that the first thing I would buy myself was a pair of left-handed pinking shears — I CANNOT CUT ANYTHING WITH THOSE SCISSORS!! …but I digress — I LOVE THE LITTLE PINCUSHIONS…
Ginny
How very clever! Thank you for sharing!
what a great video-thanks Cathi for the head’s up-I think they’d make great rings-one for each hand-just don’t forget to remove the pins before you go out!
Would LOVE to win a finger pincushion. I would probably forget to remove it when I left the house too! LOL
Or, if I don’t win, I will make one. Since I don’t have silk batting, I will probably use some wool scraps 🙂
These are just the cutest! Now that I have my Two Fabric Challenge from our guild done, {using Inklingo of course) I am going to get back to adding more to my webpage than just my Dear Edith version of Dear Jane quilt. I am goiung to add some of my Inklingo projects that I am doing or have already done.
I would love to win one of your finger pincushions. I am left-handed and that would be soooooo awesome. I loved the video and I have got to get me one of those Monkey’s – she is awesome!!! Also, I would definitely have “someone to watch over me” while in my quilting mode. Thanks so much – Debra
Loved the video, especially Monkey all decked out in his pincushion best! I am definitely going to make a bunch of these! First up, an apple green one to match my sewing room!
Monkey looked great in the video although he was a little overwhelmed at the end with all the little pincushions hanging all over him. I know he was grateful they didn’t have pins!
What a great idea.
Thanks for sharing!
Love the video and the music just makes it.
What a cute video!!!!! Love the pincushion but will have to buy a glue gun to make one.
Liz
Great Idea. Just what I need, as I travel with my sewinf a lot
Lois
You always have the best ideas. So great that it works for Monkey, too. Bonnie and Linda–two of my friends are friends, too! Cool! Would love to win one of your cute little pincushions, Linda. You’re a gem.
What a hoot!!
I LOVED THE VIDEO ON HOW EASY IT IS TO MAKE THIS HANDY PINCUSHION. GREAT WEBSITE ONE I WILL BE RETURNING TO DAILY.
[email protected]
What a great idea. I made a pin cushion that looks like a flower, is glued to a long golf tee so it can sit in your spool of thread. Great for hand stitching. But yours is even better since it goes with you and can be used for ANY kind of stitching. Can’t wait to make some. (hint hint – Tuesday is my birthday . . . . )
Love them!! Love the video!!! And I love Monkey too :o)
Janey Freedman
What a novel idea! If I made one of these, I wouldn’t have pins rolling around on my sewing machine!
You have merged your tutorial with fun. Always a winning combination! I was gifted with a finger pincushion, but quit using it because I kept pricking my finger every time I put in a pin. Using the large button as a base would certainly solve that problem.
Thanks for shraring!
Nancy Eha
Quick video, but to the point. I just loved the part showing Monkey with his new sets of earings. Hee hee hee hee hee.
Great Fun! Thanks Linda.
Absolutely the cutest thing I have watched in a long time. Loved the monkey, loved the music, loved the video. Liked the finger pin cushion idea on a button instead of a bottlecap much less bulk and weight on the finger. I watched the silly thing three times, it was like I became addicted. Thank you for a fun moment in my day.
Adorable! And yes, Monkey, I do mean you too! lol I never thought to rough cut with a rotary cutter. I would have been sitting there with a pair of scissors. Another great use for all those buttons too! Thanks!
CUTE video!! I will be making one of these.
This is SO clever! Why didn’t I think of it? I have a finger pin cushion made with a bottle cap but this is much better. And I have lots of big buttons. Can’t wait to make some to match every sewing mood and outfit!
I couldn’t keep a straight face either. Great video and deliciously timed ending. I should make some of these as I’m always putting my large pincushion just out of reach.
That was great when Monkey was decoratored with the results I burst out laughing. You were having fun. How did you learn to do video so well.
These are great and I absolutely love the 1 minute tutorial. Really cool idea! Thanks!
I’m going to make one to match each of my sewing room outfits!
I have seen other finger pinchusions, but this one is something I think I would really like. Thanks for the instructions.
Fun video and the perfect music. Monkey makes a great model!
Found you via Bonnie Hunter…love the video! I think I can make these – Thanks!
Thanks for the tutorial and the fun music! I’ve never heard of finger pin cushions before… I think this may be something I need to try…
Brilliant idea. Thanks to Bonnie Hunter for the heads up on this one! At last, something usefull to do with odd buttons.
It’s been so long since I visited…I’ve forgotten all the cool stuff here. Thanks Bonnie for the link!
Great video! I was just thinking of making one of these pin cushions the other day when I was watching another one of your videos. Thanks for the directions!! Love Monkey’s earrings!!
Great video! Really emphasizes how easy these are to make!