
IS BIGGER BETTER?
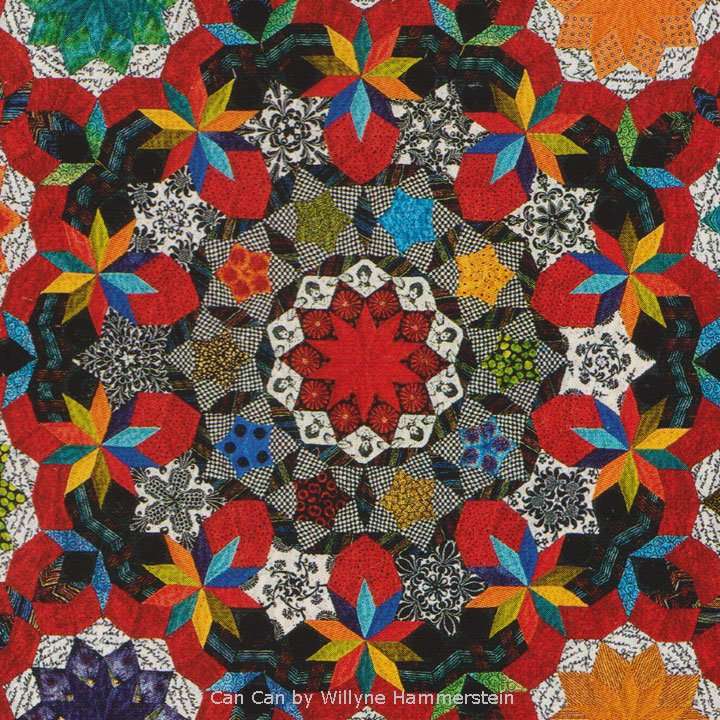
Quilters who asked for Willyne’s Can Can shapes to be Inklingo-able all asked for something a little larger than the size in the book.
I have 3 COOL TIPS for making Can Can with Inklingo.
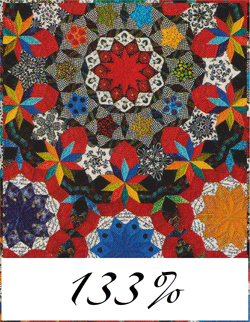
No one had already started sewing the original size, so I only did the 133% shapes this time. (Often quilters start with paper piecing—EPP—and switch to Inklingo, so I always ask.)
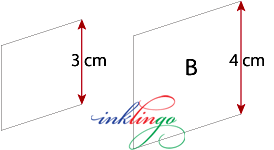
The sides of the A B and D shapes are 4 cm instead of 3 cm (1.57 instead of 1.18 inches).
The larger size makes a larger quilt (approx 63 x 74 inches without borders) and works well with fabrics with larger designs. With larger shapes, it is easier to sew at least some of the shapes by machine. These are all good reasons for making it bigger.
HOW MUCH FABRIC?
Bigger shapes, more fabric. No problem!
The detailed fabric requirements in Millefiori Quilts 3 won’t be enough because the shapes are bigger, but Inklingo makes it easy to adapt any pattern to another size.
- Look up the number of shapes from each fabric. (Millefiori Quilts 3)
- Look up the requirements in the Inklingo Catalogue of Shapes. (Can Can 133%)
- Record in pencil on Monkey’s Cheat Sheet.
I have written about Monkey’s Cheat Sheet many times.
As usual the shapes are counted for you in the book. See pages 156-157 for the number of A, B, C and D shapes you need from each fabric.
I have three cool tips too.
For example, for Rosette 1, if you need 10 red A diamonds and want to use Layout 2 (which is great for stripes), cut the freezer paper 5 x 11.25. (Can Can Catalogue of Shapes, page 17)
COOL TIP # 1 – MORE OPTIONS
For Layout 1 of A, there are many custom sizes listed, but nothing for 10 shapes. Don’t let that limit you!
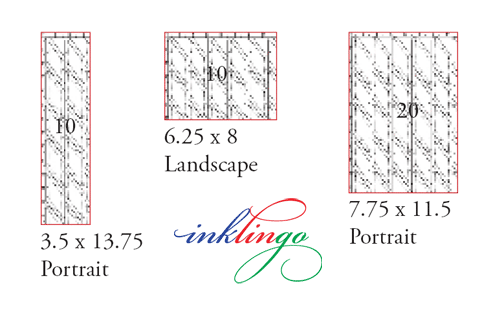
Make up your own options! Just look at the layout and count. (You may want to print the layout on scrap paper first.)
For 10 shapes, I have shown two more options (above). You can choose depending on the shape of your scraps. If it is a long, narrow scrap, it works. If it is a wider piece, that works too. If you already have freezer paper cut to 6.25 x 8 for something else, you might prefer to use it again instead of cutting a new piece.
Many quilters print the page with Custom Sizes (e.g. page 15) and make notes on it to save in a binder.
COOL TIP # 2 – SQUARE INCHES
If you want to know which option uses less fabric, you can multiply to get the square inches.
Using the example above for 10 A diamonds:
- 3.5 x 13.75 = 48.125 square inches
- 6.25 x 8 = 50 square inches
This is a tiny bit of difference, less than 2 square inches. If you will be using the same red fabric for another rosette, print 20 at a time and save more than 7 square inches of fabric.
- 7.75 x 11.5 = 89.125 square inches
Isn’t that cool?
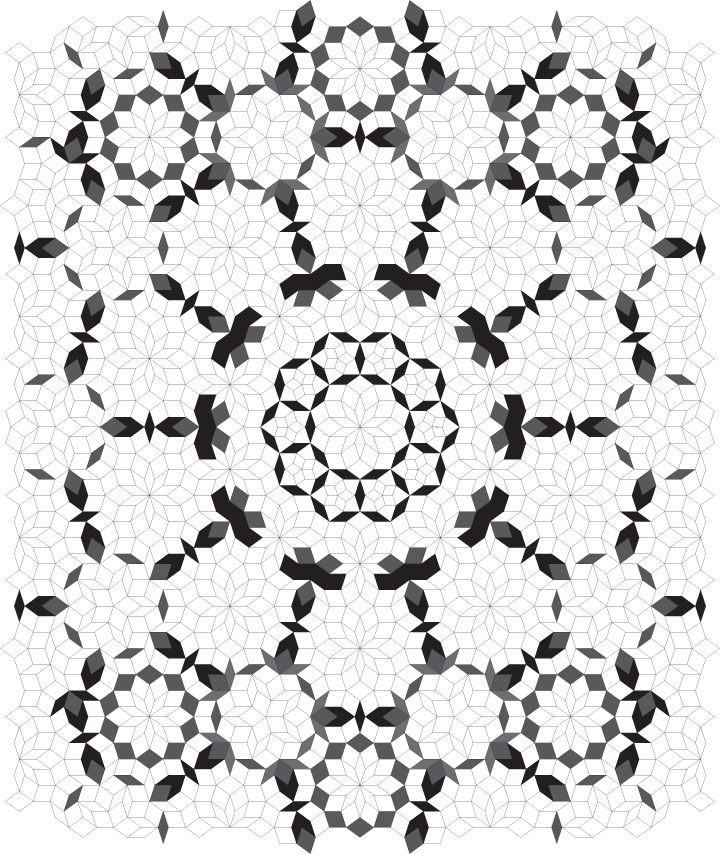
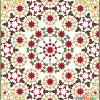
COOL TIP # 3 – LOOK FOR CONTRAST
If you are changing the colors, look for the areas of greatest contrast to guide you.
This diagram shows the darkest areas in the original quilt.
Willyne used at least two different black fabrics. You might decide to use any other color, keeping in mind that when these shapes are dark, you will keep the overall look of the original Can Can.
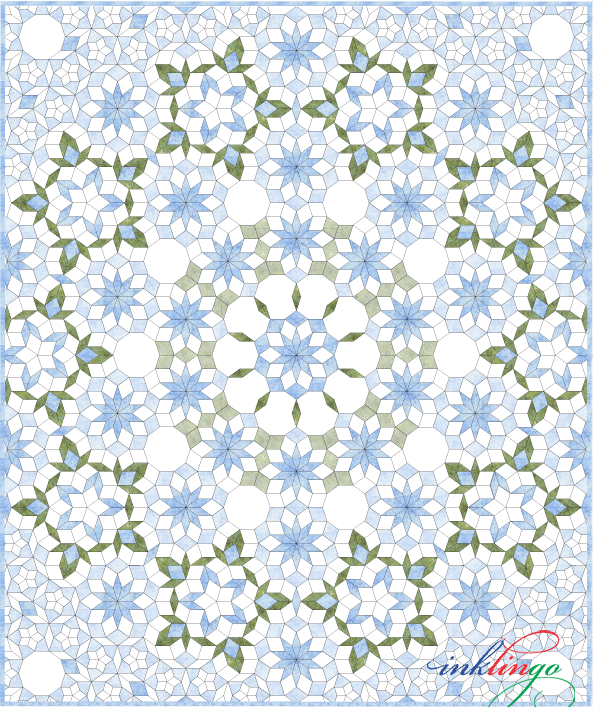
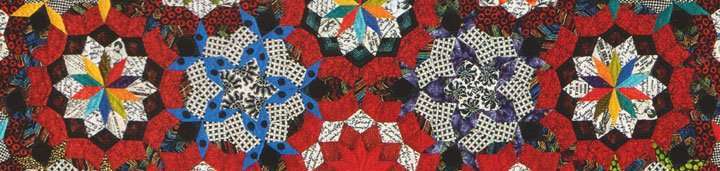
CAN CAN VARIATIONS
Most quilters are probably making the quilt in the “controlled scrappy” look of the original but it is nice to have options.
Good news. I will share tips for a variation next time. Please stay tuned.
REMINDERS
1. The low intro sale price on Can Can 133% ends tonight at midnight. $15 instead of $20 AND I add the Hexagon Quilt Design Book too!
2. If you will be sewing the stars by machine, like me, you can follow the instructions in the Golden Wedding Ring Design Book. It is still free.
3. This beautiful book is in stock. Main Millefiori Page
You don’t need acrylic or papers but you do need the detailed diagrams for the assembly. Willyne has perfected the instructions, breaking it down into sensible sections. It is a complex design and these instructions are even better than the good instructions in the first two books. I find them easy to follow.
Willyne teaches hand piecing with a running stitch. Sewing with a running stitch is fast and easy when you print the shapes on fabric with your Inkjet. It makes the preparation faster AND more precise than with any other method.
5. List of other Inklingo-able Millefiori Quilts 3 designs. Mille 3 is my favorite of all of the books.

Start printing with the free Diamond Triangle Square shapes! All you need is a computer (Windows or Mac), Adobe Reader (free), and an Inkjet printer. Inklingo is all about making quilting more accessible.
HAPPY THANKSGIVING!
We have so much to be thankful for that Russ and I celebrate twice, on Canadian Thanksgiving in October and American Thanksgiving in November. We were thinking of you.
I planned to post this yesterday but when I got up in the morning, my InBox was overflowing with a ridiculous number of Black Friday Sales. It was overwhelming and I was afraid my email for Cool Tips would be lost in the shuffle. I decided to hold it until today.
I hope all our American friends had a wonderful Thanksgiving feast AND a great shopping experience—and are ready to dance the Can Can again.
Thank you for visiting. I hope you will stay subscribed for my next article about Can Can.
Linda & Monkey
Good plan to wait until today to share the tips! Is there any chance that you did or could include a blank layout of the can can in the shape collection? It would be super to have it to color to try out options like you’ve done.
No Black Friday shopping for me, Linda. I had to put in some hours at work, but then I could sew. I am focusing on quilting my Case of the Secret Garden mystery quilt. It is about time that I finished it, don’t you think? Ha, ha! I hope to finish it sometime next month. I may give it to my oldest sister since she says that she really likes it.
Hi Laura, Case of the Secret Garden is a favorite of mine. Thank you for letting me know you are making such good progress. I would love to see photos!
Oh my gosh I love these Willyne quilts.
I agree, Lisa! Willyne’s quilts are an inspiration.
Hello Linda,
Thank you for these new sizes for this quilt. It was nice of you to wait until today to post this. I had the same problem as you, my inbox was so loaded with Black Friday messages it was crazy. It will be nice to be able to make this quilt with a bigger size shape. Do you think that we could make this quilt with lighter colors? Would the results be as beautiful? Thank you for your help.
Best regards,
Louise
Hi Louise, I think this design by Willyne could look wonderful in many different colors!