This video demonstrates how I prepare fabric sheets. Monkey says it’s probably faster than reading this page!
We have some great tips for printing on fabric. If you use them, you will save time, save fabric, and avoid jams!
This is NOT my recommended method for preparing fabric sheets:
- Wash and dry the fabric.
- Iron the fabric.
- Cut the freezer paper to size.
- Cut the fabric the same size or slightly smaller.
- Heat the iron to Cotton, no steam.
- Lay the freezer paper down on a bread board, plastic side up.
- Center the fabric on the freezer paper, inset from the edges on four sides.
- Press.
- Flip it over.
- Press again.
- Flip and press a few more times.
- Trim loose threads.
That method will work, but it is not the fastest, easiest way. It is not the method I recommend in the free first chapter of The Inklingo Handbook. (Download it free from a link at the bottom of that page. It is also included in the free shape collection.)
The method I use saves time and effort. It allows me to prepare many, many sheets at a time, and print stacks of fabric without jams. Interested?
This is my recommended method of preparing fabric sheets:
- Wash and dry the fabric and fold it neatly. Skip the ironing!
- Cut the FP to size and label it.
- Heat the iron to Cotton or Linen, no steam.
- Smooth the fabric out on your ironing board, right side up.
- Place the FP on the fabric, plastic side down, label up, and press.
- Trim the fabric along the edges of the FP.
- Press on both sides again.
I find this method much faster and easier than cutting the fabric and the FP separately and trying to line them up. It also avoids loose threads and makes it easier to re-use sheets of FP.
1. Wash and dry the fabric and fold it neatly. Skip the ironing!
In addition to all the other benefits, washing the fabric avoids jams in the printer.
If you wash the fabric first to remove the sizing, excess dye, and other chemicals, the freezer paper (FP) will stick better. Almost all printer jams are caused by the FP separating from the fabric in the printer. (The other jams are caused by feeding the sheets crooked. Both problems are preventable. Jams should be rare.)
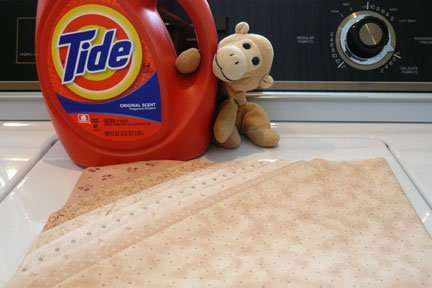
There are many reasons for washing quilt fabric. Even before Inklingo, all my new fabric went into the next regular load of laundry before it went in my stash. (The only exception is the occasional whole bolt, which I keep separate, and just wash a yard or two at a time, as I need it.)
I met someone who worked in a fabric factory, and she told me that if I had ever seen how fabric is made and stored, I wouldn’t even think about it. I would wash everything immediately, if not sooner!
The quilts made in the olden days from old clothing were made with fabric which had been washed many times before it was used in a quilt. I don’t think they liked the puckered look of uneven shrinkage or bleeding any more than I do.
I just throw new fabric in with my regular wash, similar colors. I don’t do anything special, but you can find tips online about cutting the corners, serging the edges, pinking the edges, etc. If a fabric frays excessively, I want to know about it! I sometimes trim wads of thread before I toss it in the dryer. I remove it from the dryer warm and fold it immediately.
I don’t put charms and jelly rolls in the washing machine. I swish them around in water, blot on a towel, and lay flat to dry. Even 5 x 5 inch charms shrink more in one direction than the other, and it is significant.
There are several good online articles which describe the importance of washing fabric. Google “wash quilt fabric” without the quotation marks. I hope we can convince you. Jams are a nuisance, and you can easily avoid them.
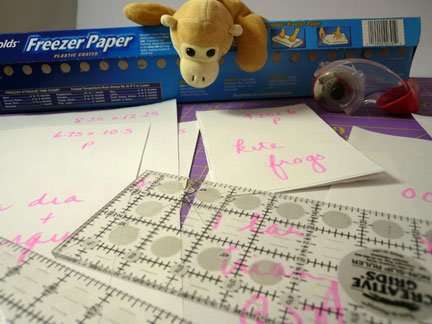
2. Cut the FP to size and label it.
Use your rotary cutter and rulers (or a paper cutter), whatever method ensures that the angles are square, so it will feed straight.
Labeling the FP will save you time and confusion when you are ironing it to the fabric and when you are entering custom sizes in the Print Dialog box.
Be especially careful to note whether you should print Portrait or Landscape to make the best use of the fabric. I just write P or L.
The freezer paper can be used many, many times. You will be glad you labeled it. Labeling also saves the occasional error of setting the iron down on the plastic coated side of the FP.
3. Heat the iron to Cotton or Linen, no steam.
It takes a hot, dry iron to get a good bond between the FP and the fabric.
As they age, most irons do not get as hot as they do when they are new. On an old iron, you might need to crank it up to the max (Linen setting) to get it as hot as it used to get on the Cotton setting.
Quilters sometimes iron on a hard surface like a wooden bread board, instead of a soft ironing board, if the iron does not get hot enough even on the top setting. A hard surface helps make a good bond.
TIP Irons are cheap. If you can, get a new, inexpensive one, so it can be as hot as it should be. Bottom-of-the-line is fine, but there is one nice feature I like, and you might like it too. I look for an iron that can press without steam even when there is still water in the tank. I do all of my quilt pressing without steam, but I don’t want to bother going to the sink to empty the tank if I have been using steam on clothing.
With the right amount of heat, the fabric will not jam in the printer, and the freezer paper will peel off neatly to be used over and over and over again.
4. Smooth the fabric out on the ironing board, right side up.
If the fabric was folded neatly, it should not be very wrinkled, but you can run the iron over some of it now, if necessary.
It is ideal to have a straight, cut edge toward you, with excess fabric draped over the far side, out of your way.
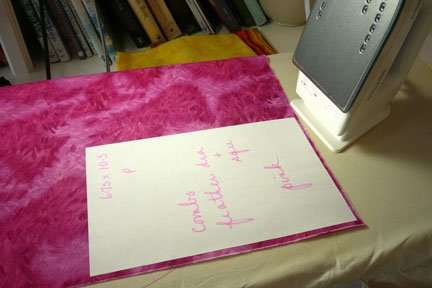
5. Place the freezer paper on the fabric, plastic side down, label up, and press.
The FP should be lined up with the straight grain of the fabric, so the threads in the fabric are parallel to the edge of the FP.
Trim (step 6) before placing the next sheet of FP.
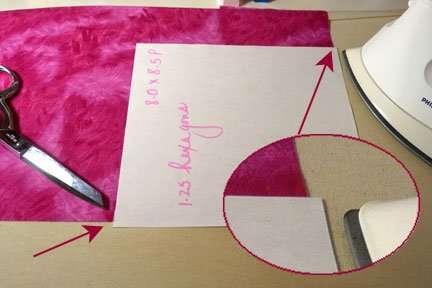
6. Trim the fabric along the edges of the FP.
Use big scissors (shears) and gently pull the fabric with your non-scissors hand. Since I am right-handed, I find it easy to get a smooth cut when I cut along the left edge of the FP, gently pulling the fabric away from the FP with my left hand. I can cut on the right side of the FP when necessary, but it is not as fast as it is when I can control the fabric.
For the first sheet of FP, I usually have to trim all four sides.
After a few sheets, there are straight cut edges on two sides of the fabric. I can place the FP so I only have to trim the other two sides. The fabric is slightly inset from the edge of the FP (above).
(The Suggested Custom Page Sizes in the Inklingo Catalogue of Shapes allow margins of 0.25 inch on the top and sides, and 0.5 inch on the bottom. That is what is required by most Inkjet printers, so you get all of each shape even if the fabric is slightly smaller than the FP.)
7. Press on both sides again.
Press on the paper side and the fabric side again, until you are sure you have a good bond with no bubbles or loose spots. With the right amount of heat, the FP will stick well enough to go through the printer but peel off easily to be used again many times.
Repeat steps 4 to 7 as many times as necessary.
There are more illustrations in The Inklingo Handbook, and some great tips, like these:
Print the custom size once before cutting piles of FP to size.
Consider moving the ironing board so it is near the computer. If it is, you can set up a routine so you are ironing the next sheets while other sheets are printing. Print, peel off the FP, press, trim, press both sides, print, peel. . . and so on. With this method I can print many, many sheets during a one hour TV show.
You can put your first sheet of fabric through the printer right now because there is a test page PDF in an earlier blog message.
I hope these tips will save you time and help you avoid jams.
Have I forgotten anything? Please leave a comment with your best tips too!
Thank you for visiting.
Linda & Monkey
PS Do you receive an email every time there is a new message here? You do if you subscribe (right sidebar).
“Printing with Inklingo” (the first chapter of the handbook) is so important that it is included in the free shape collection for Diamonds, Triangles, and Squares, and several other places on the web site. Print the 48 pages yourself, or order the handbook and have all 128 pages professionally printed on beautiful glossy paper (bound or loose-leaf).






Hi Linda I haven’t started yet but will very soon. My only question is and I guess it only really matters when fussy cutting in particular, how do you make sure your printer grabs your fp and fabric exactly straight each and every time.
Hi Linda I haven’t started yet but will very soon. My only question is and I guess it only really matters when fussy cutting in particular, how do you make sure your printer grabs your fp and fabric exactly straight each and every time. Otherwise the fussy cutting would be a nightmare I imagine?
I just printed a photo of one of my dogs on white muslin… used a Canon Pixma inkjet printer. Do I need to now treat the fabric so the image stays on the muslin? I didn’t see anything referencing this…
Thank you.
Great post and comments! I haven’t tried inklingo yet but am hoping to this week-end in preparation of buying templates for Celtic mystery. I am hoping it works for me (or I work for it-lol) seems like a great system and such a well organized site. Also, I haven’t been able to find tri-recs triangle rulers in the 3 cities I have tried.
Hi LaVahn,
It is a shame that HP is not including custom sizes in their printer software as often anymore. The good news is that you can just use the closest size, as you suggested. You might want to cut the fabric smaller than the freezer paper to avoid waste.
There is a note about different printers in the FAQ.
http://www.inklingo.com/section/faq/question/45#q45
HP used to include “user defined” or “custom sizes” in the software for all of its Inkjet printers. It is a mystery why they stopped. It is a good idea to let them know that you need it because if they know people want it, they could update the printer driver (small piece of software). Then everyone could download the new driver from their website and print custom sizes.
http://www.inklingo.com/section/custom-page-sizes/43
If you have any other questions as you go along, please ask. I am happy to help.
Linda- I am still trying to figure out the paper sizing for my HP Officejet 4500. There are many sizes of paper to choose from, but no custom size option. Will it be all right to choose the size closest to the one suggested in the pattern info? For instance, instead of 6.75″ x 9.75″, can I use 7.25″ x 10.5″? I am excited to get started using your method of piecing. I can see how it will make it much easier to get very exact blocks. No more saying “A man on a galloping horse would never notice!”
Ooopsy! I’ve been doing the first method of applying fabric to the FP. (ie cutting fabric a little smaller then applying on top of the FP) I will try your way from now on. I must try to figure a better space set up of my printer/ironing/laptop arrangement.
Nicely explained tutorial of how to best print on fabric. Thank you 🙂 hugs Elly ps I came here via a link on Cathi’s new pattern pdf 😉
Hi Cathie,
Cutting the fabric and the freezer paper separately is NOT dumb—just slower and more difficult.
I do it sometimes when I am working with itty bitty scraps, or when I need to squeeze shapes out of the smallest possible amount of fabric without wasting a single shred.
No one should feel dumb for doing it that way, but most of the time it is faster and easier to iron the FP to the fabric and trim. There are other great tips like this in the free chapter of the handbook.
I have heard from a few other quilters about this too. They loved Inklingo before. How much more will they love it now that it is even faster and easier for them? Wow!
Thanks for the lesson Linda. I have been an on again off again fabric washer. I always wash my Inklingo fabric or something that will be fused with fusible web but I have to admit since I have so many fat quarters that I don’t want to put in the washer it seems overwhelming to think of washing it all! I think I will ponder a bit more on the virtues of washing and see what happens.
Also I have been guilty of cutting the fabric to size and then trying to make it fit on the FP…how dumb was that! LOL Thanks for setting me right.
I have often wondered why anyone would resist washing their quilt fabric when there are so many good reasons for it. I did not know anyone told you to iron it too! That is a drag!
I hesitated to write such a loooooong message, because I did not want to make it look harder than it is. I didn’t think many people would read so many words—but you did! And it makes me feel great that you will have more time to sew. Thank you for all the comments.
Hi Linda!
This may have been long – your words, not mine – but I understood EVERYTHING!!! Your explications were not confusing!!! *VBG*
Tks… I’ve learned a few shortcuts and shortcuts are a GOOD thing!
*still grinning, early this morning*
Have a great Tuesday!
Rosa
I’ve recently got a printer having owned some Inklingo shapes for a few months. I am very glad you posted this as my current method of prepping my sheets looks very like the way you say NOT to do it, lol.
I have always washed fabric after buying it, then i iron it, fold it nicely, put it away. When i want to use it i have to iron it again first, sigh.
thanks Linda 🙂
“Easy-Peasy” as my granddaughter says. Perfectly clear instructions. I purchased my no holes, no steam iron from Vermont Country Store. The only place that had them at the time I was looking.
I love it that you don’t iron when fabric comes out of the dryer. I will definitely alter my printing routine to eliminate that one step. Thank you for the clear and precise recap.
One suggestion for all Inklingoists: Print this out and hang it up in your sewing area!!!
I am.
Great explanation Linda! I can’t tell you how many times this one “obstacle” prevents me from trying out Inklingo. Now that it’s very concise and clear, I am posting it above my ironing board. No more excuses for me!
Great job. Now, if someone does not understand, it’s their falut. You couldn’t have made it any clearer. Thanks
Try to find an iron with no steam. No holes and a nice flat, smooth surface. I have a Black and Decker I found at our local supermarket in the small appliance section. I love it so much I am going to go back and buy another one to store away in case something happens to this one. An added bonus it gets really hot!
Carol from Panama
Hi Peggy, Once I iron the FP to the fabric, I don’t have to move it back to the cutting mat. It is much easier for me to cut with scissors at the ironing board. I hope you will try it and let me know if you like it.
Just one question, Linda. When you are trimming the fabric along the edges of the freezer paper…why do you use scissors rather than a rotary cutter. Is there an advantage to doing that? Thanks for your answer
Peggy S.