
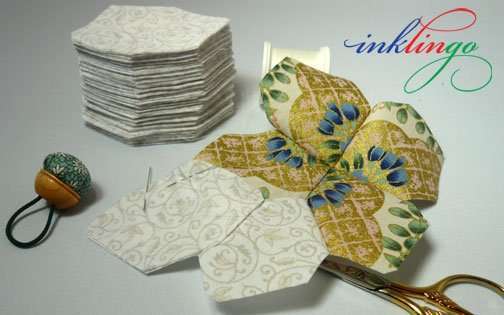
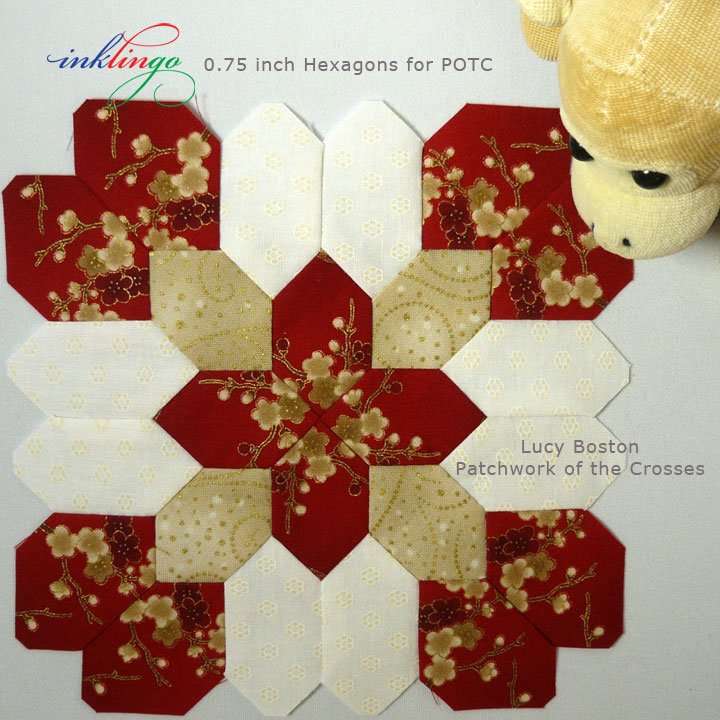
Only one template is required for POTC blocks. It is a 90° Hexagon, and all six sides are 1 inch. (Three other sizes are available from Inklingo.)
Since I wrote the book, several quilters have asked if I sell an acrylic template for the hexagon.
I don’t sell acrylic templates! (Why?)
However, this article explains how to make an acrylic template for ANY shape!
These templates are free because you already have everything you need in your sewing room!
- an acrylic ruler*
- a scrap of freezer paper (FP)
- hot, dry iron (or glue stick)
Even if you need to buy freezer paper or a ruler, these are cheap acrylic templates!
*For the POTC hexagon, I prefer to use a 1 x 12-inch ruler, but you can use any other acrylic ruler. (A very big one will be awkward.)
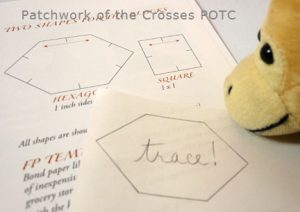
Trace the template onto FP (or print with Inklingo, or draw it) and cut it out.
I normally use a rotary cutter but scissors make it portable.
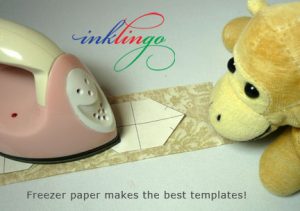
Position the FP template on the fabric, plastic-coated side down. You can make sure it stays in position by pressing it with a hot, dry iron.
The freezer paper will bond temporarily, peel off, and be ready to use over and over and over again!
(If you don’t want to use an iron, use a small dab of glue-stick on the plastic coated side to hold it in position temporarily. Once there is glue on the plastic coated side, don’t use that template with a hot iron again.)
So far this is just a freezer paper template but . . .
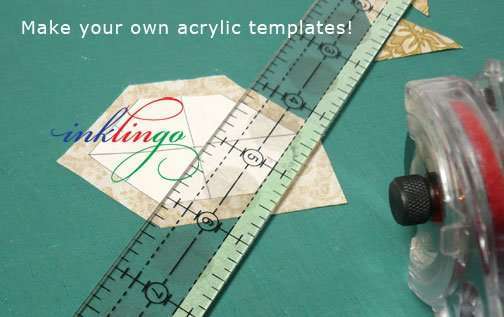
. . . it just needs the ruler to give you the acrylic edges!
Align the acrylic ruler so that when you rotary cut you add seam allowance all the way around.
From here on, all of the tips you know for using an ordinary acrylic template are the same—except that you have more to hold onto and the templates don’t slip!
More accurate! You aren’t sacrificing any benefits and you save money.
That’s it! Isn’t this cool?
FP + acrylic ruler = acrylic template
- Any shape!
- Have as many as you want!
- They’re free! (Spend the money on fabric instead!)
- If you lose it, just make another one!
- No waiting to start a project!
- Never out of stock!
TIP Position masking tape on the underside of the ruler to make it easy to add the same seam allowance every time.
I add 0.25 inch for hand piecing (above) but you can make the seam allowance as wide or as narrow as you like. It is your choice, not the choice of whoever cut the acrylic.
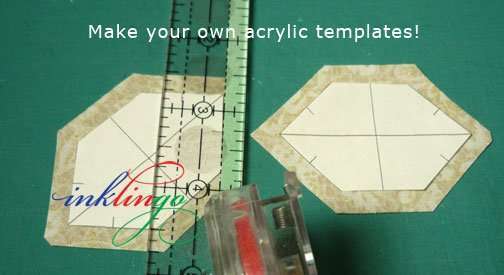
I find cutting the fabric easier and more precise than with an acrylic hexagon, which can slip out of position.
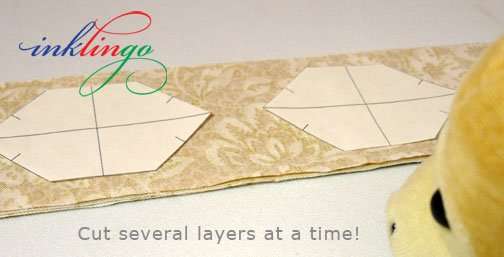
You can cut several layers at a time this way, just the way you can with an ordinary acrylic template. Move the freezer paper to another 4 or 5 layers of fabric and repeat.
There are tips for using templates in another article in the Top Ten Tutes on the blog too. You will be amazed by how fast it goes!
For example:
- use pre-cut strips
- use a strip of paper to space the templates
PREFER SEWING LINES?
This method of making your own templates works the same way as an ordinary acrylic template that you pay for—so you don’t have sewing lines.
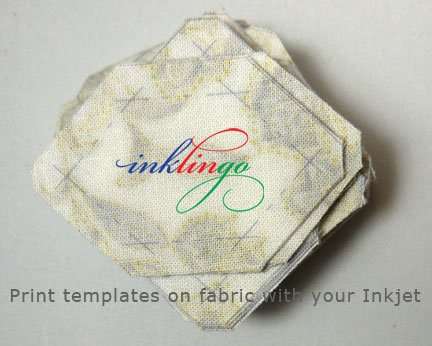
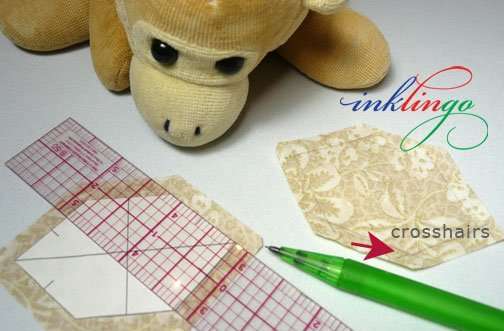
Quilters who print the shapes on fabric with Inklingo know how wonderful it is to have the sewing lines, crosshairs, and matching marks printed on every hexagon. It makes it faster and easier to get precise results whether you sew by hand or by machine.
However, if the shapes are not available from Inklingo (yet), or if the particular fabric is too dark on the wrong side to print, or if you are fussy cutting, you can mark the sewing lines manually.
- Press the FP on the wrong side of the fabric.
- Cut one layer at a time.
- Use a thin, flexible ruler (not an acrylic ruler) and a mechanical pencil to mark the sewing lines.
- Extend the lines beyond the corners, so you have crosshairs to mark the seam endings.
(I never had much luck peering at tiny dots marked through holes in an acrylic template!)
I have been using and teaching this method for fifteen years.
Marking seam lines manually is also easier than basting fabric to a template for English Paper Piecing. I do not recommend EPP for any design, including POTC. The results don’t justify the extra work.
.
Of course, printing the shapes on fabric with Inklingo and rotary cutting several layers at a time is easier and more precise.
This video shows how you can sew by hand or by machine.
You don`t need to buy acrylic for Passacaglia from Millefiori Quilts by Willyne Hammerstein, either. Make your own acrylic templates!

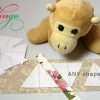
Monkey says you don’t have to be a rocket scientist to realize that this method works for any shape like these equilateral triangles.
Anything you can draw on freezer paper can be an “acrylic” template when you use FP and an ordinary acrylic ruler—even ones with curved sides!
Using templates without seam allowances allows you to draw the complete sewing line if you want it. No more dot-to-dot!
Whether you use Inklingo or not, you no longer need to find, buy, and store acrylic templates. You also won’t have to wait to start a project when you use freezer paper!
Inklingo is all about making quilting more accessible. Acrylic templates never need to cost you anything.
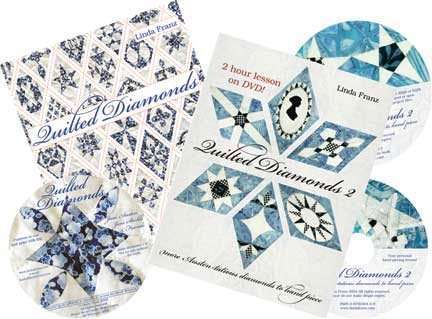
QUILTED DIAMONDS
My Quilted Diamonds books teach everything you need to know about hand piecing with freezer paper templates. I wrote those books and produced the two-hour lesson on DVD in 2002, 2003 and 2004. Both books have been reprinted and are still available.
QD books are about hand piecing, but freezer paper templates are better than acrylic when sewing by machine, too.
If it had not been for the popularity of Quilted Diamonds, I probably never would have invented Inklingo.
Once you have turned freezer paper templates into acrylic templates, you won’t want to buy acrylic shapes for any design.
That’s great for everyone (except the big companies that manufacture acrylic sheets) because it leaves you more money to spend in shops on patterns, classes, and fabric!

If you would like to skip templates entirely and print the shapes on fabric instead, the Beginner’s Page has step-by-step instructions and a video.
I would love to see photos of what you are making with Inklingo. You can browse the albums in the Inklingo Facebook group to see what other Inklingo quilters are sharing.
In Part 2 of this article, I will show you why I prefer free templates for fussy cutting too!
Inklingo IS the quilting tool we’ve always wanted, but when you can’t use Inklingo, use freezer paper!
Linda & Monkey
![[]](https://www.inklingo.com/wp-content/uploads/2011/04/inklingo-heart.png)

Hi. Is there a diy template for the X block please? Thanks
Hi Jacqueline, This is probably what you are looking for. https://www.inklingo.com/how-to-draw-lucy-bostons-hexagon-for-potc/ If you wish, you can email me at [email protected].
Hey Linda,
Why use acrylic templates? Inklingo is so simple to use, no need for freezer paper or templates. What could be better? I honestly don’t know.
I for one wish that we could use Inklingo for all the quilts we would like to make. Think about the stash we don’t get anymore with Inklingo. No more need to run out and buy freezer paper. Everything is in my computer, ready to use when I need it. Print on my fabric, cut and sew. Is anything easier than this, I think not.
So Linda, keep creating Inklingo shapes for so many of us are addicted.:-)
Thank you for all that you create for our enjoyment.
Best regards,
Louise
Your words are music to my ears, Louise. Thank you very much for a lovely comment.
Hi JC, The free Cleopatra’s Fan Design Book is at http://www.inklingo.com/shop/cleopatras-fan-quilt-templates/42
You already have it in your account, so you can log in on the website, download and open it whenever you like.
Download Instructions
http://www.inklingo.com/section/inklingo-download-instructions/28
If you have any questions about downloading or opening–or if I have misunderstood your question–please email me at [email protected]
Thank you, Betsy! Monkey definitely agrees with you. 🙂
where is the link for the free pattern?
Another great blog, Linda. Great idea for shapes that Inklingo doesn’t offer (yet). For me, printing the shapes on fabric with Inklingo is definitely the best way to go!! I can’t thank you enough! I know that Monkey would agree with me!!