
Originally published Dec 18, 2012, and updated 2023.
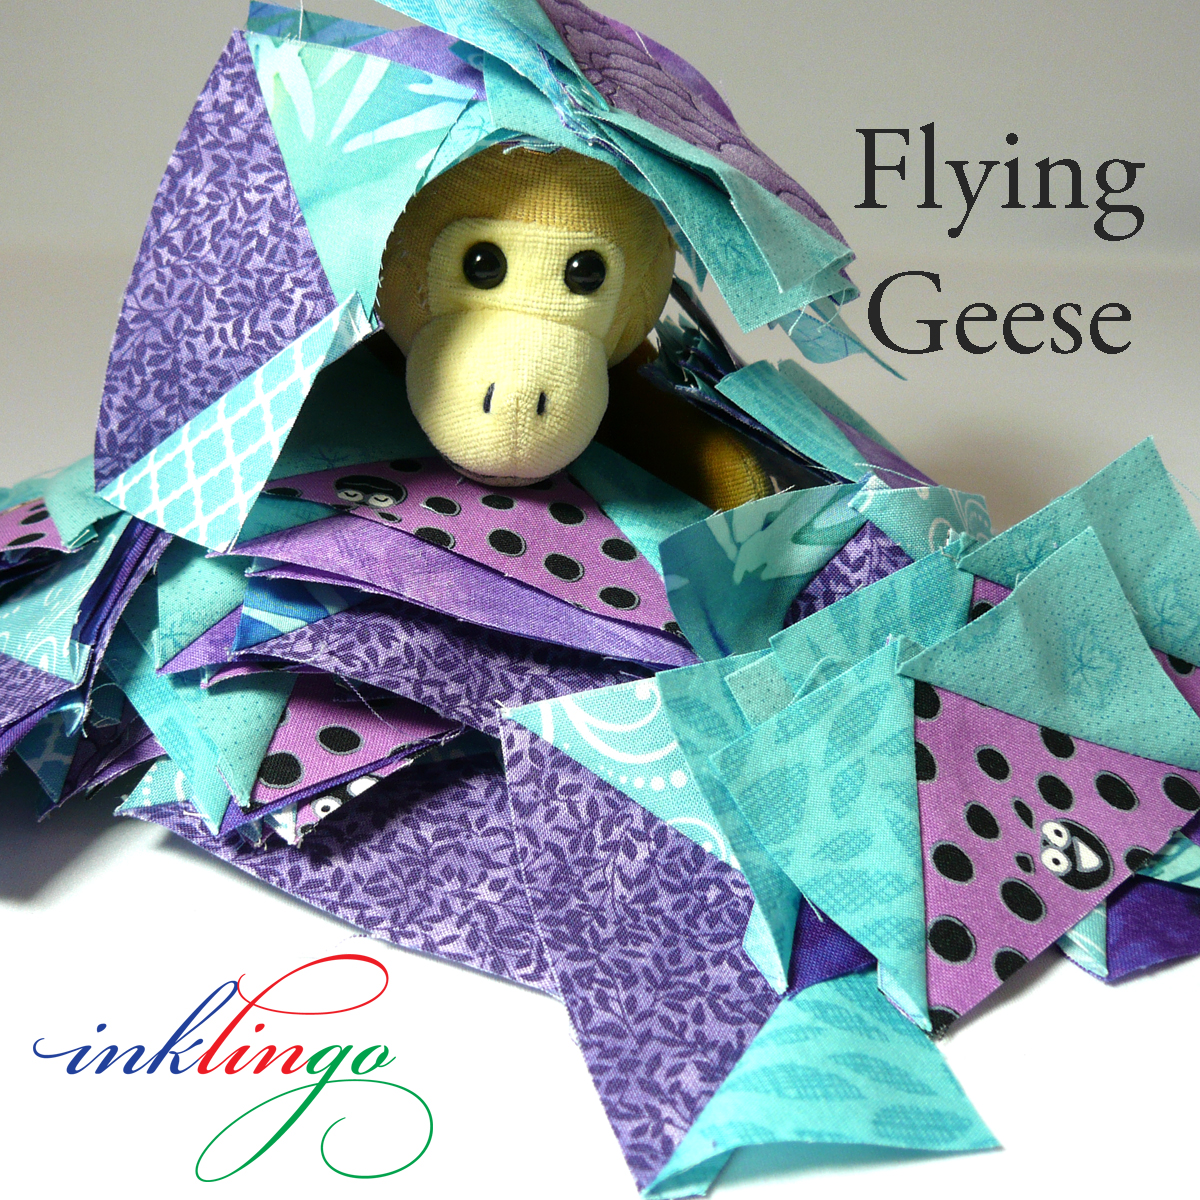
Old News about Flying Geese
More than ten years ago, I created a short video demonstrating how to sew scrappy Flying Geese quilt blocks for Bonnie Hunter’s Easy Street Mystery.
I’ve turned this method on its head now, so please read on to see how to use an upside-down ruler to cut precise squares for the QSTs instead of doing arithmetic!
Flying Geese Since 2009
Click to play (or View on YouTube)
The method has remained the same since the introduction of Free Triangle Tips in 2009.
There are several traditional methods for sewing Flying Geese, but none are faster or more accurate than Inklingo—and you can even use scissors if you need a portable project.
No templates. No need to draw lines on the fabric. No paper to stitch and remove. No specialty rulers. No waste!
So that’s all good!
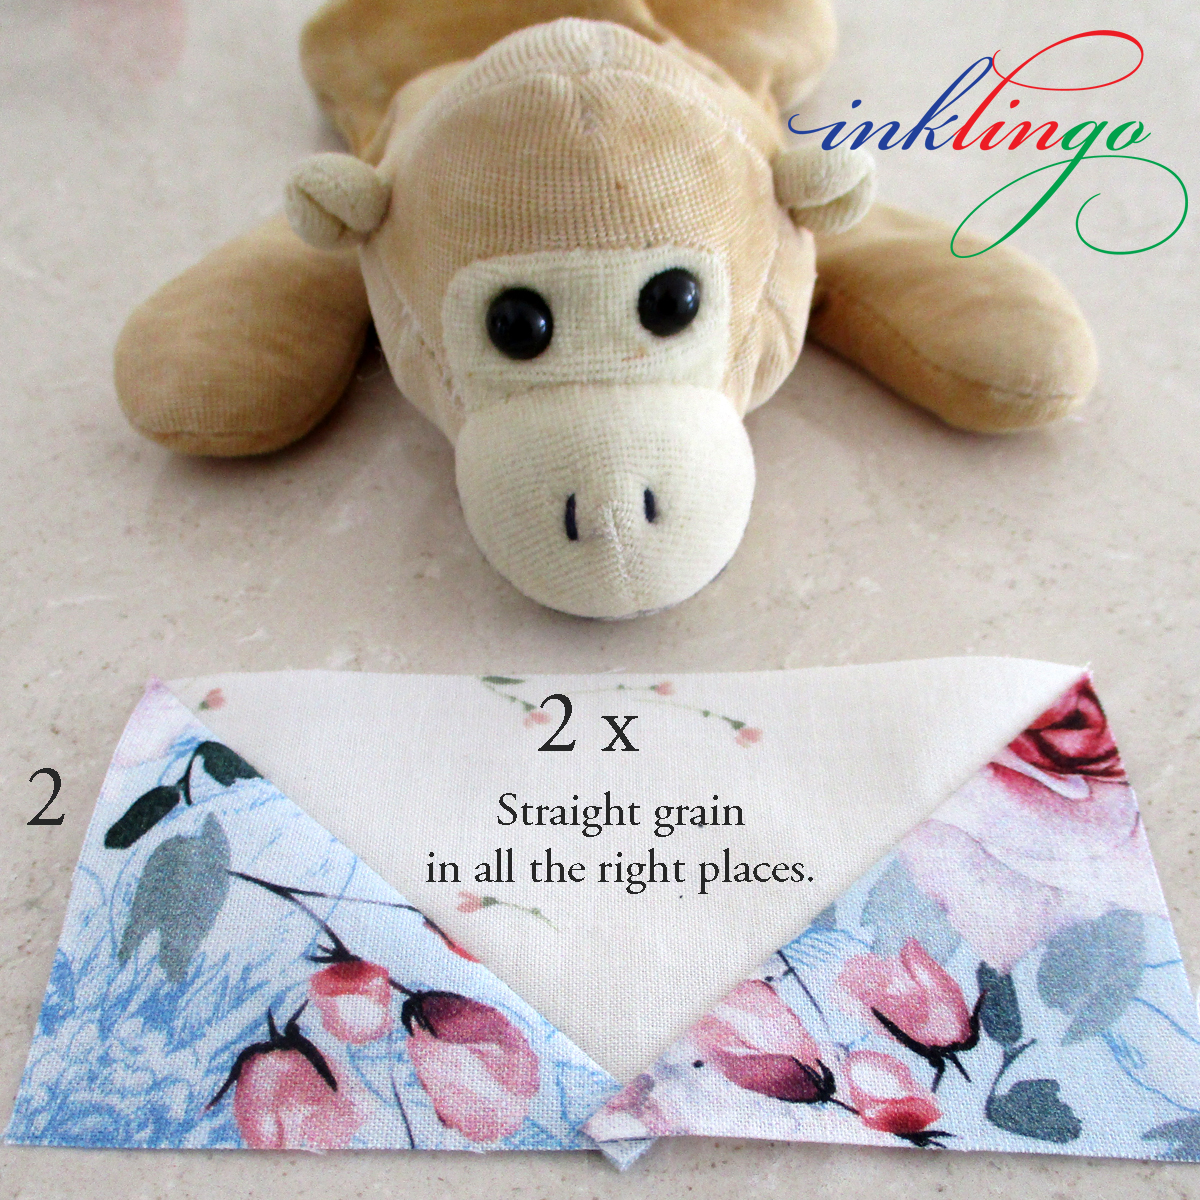
This method is wonderful for many reasons—minimal printing, the bias is sewn before it is cut to prevent distortion, there is straight grain in all the right places, and it makes 4 Flying Geese units at a time.
Love it! But there’s more…
Read on to see a new way to cut precise squares for sewing four Flying Geese units at a time without any math!
About Flying Geese Units (Math, but Interesting)
Flying Geese units are always twice as wide as they are high (e.g., 1 x 2 inches or 2 x 4 inches or 3 x 6 inches, etc.).
Inklingo makes it easy because triangles are named with the finished size. If you know the finished size of the HST, you know the finished unit will be that size times 2.
The small triangles in Flying Geese are HST with straight grain on the two short sides. The large triangle in Flying Geese is a QST because it has straight grain on the longest side.
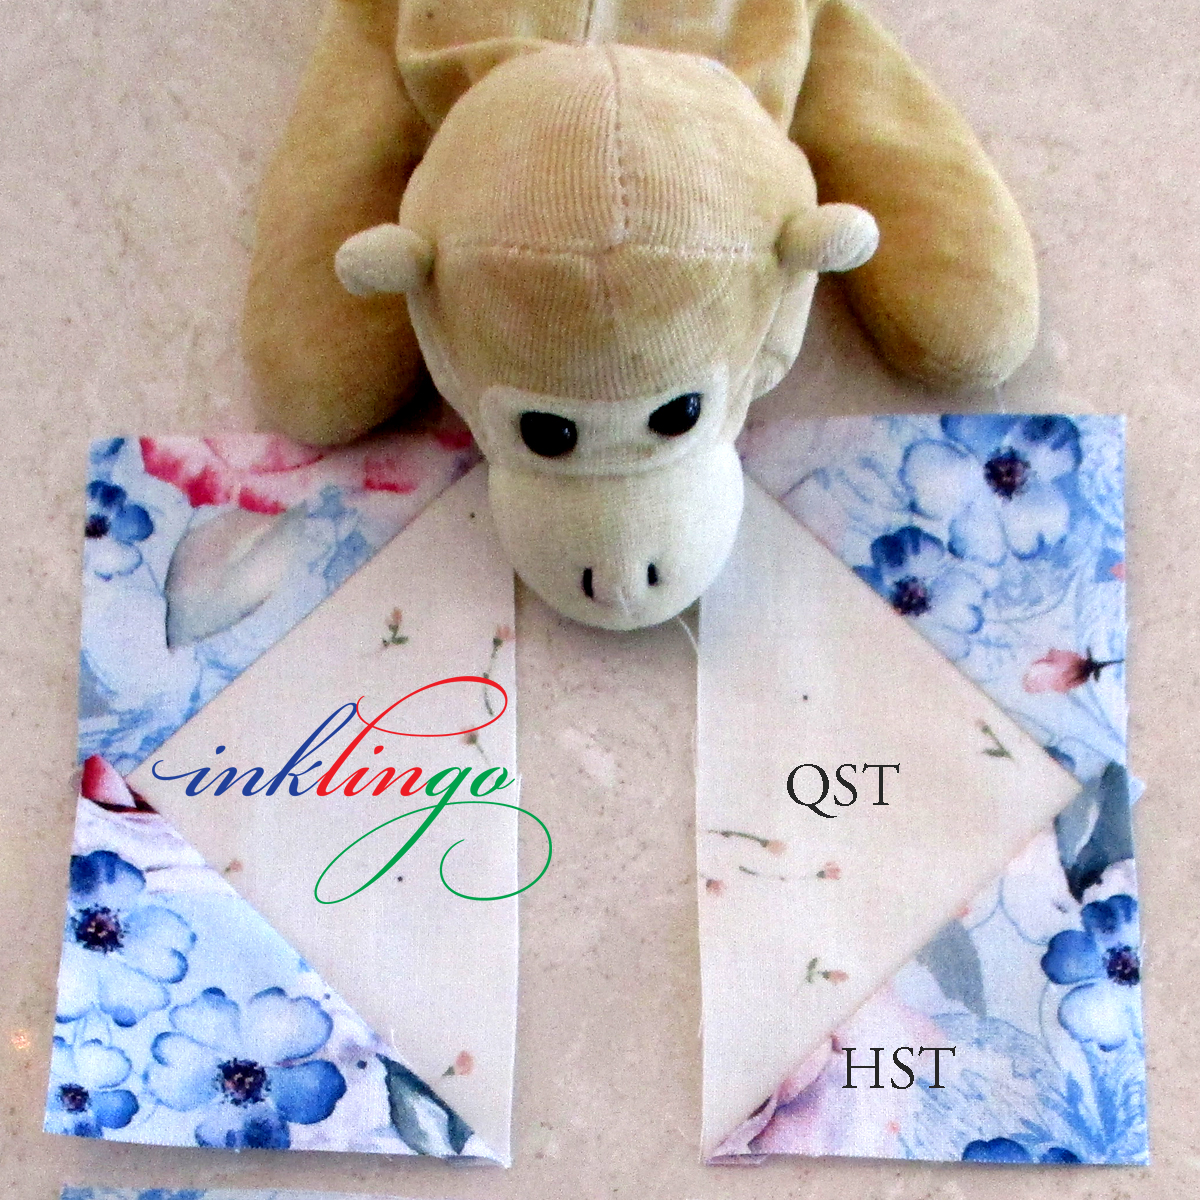
As you can see in the video, with Inklingo, we print the HST, but we do not print the QSTs. (There is straight grain on the longest edge of the big triangle, so it is a QST, as described in the Free Triangle Tips.)
For decades, the rule of thumb for cutting a square for 4 QST has been to add 1.25 inches to the finished size. For example, for a 2 x 4-inch Flying Geese, you need a 4-inch QST. The unprinted square would be 5.25 (4 + 1.25), but this is only an approximation.
(Monkey says 1.25 is an approximation for 1.21, so no one was brave enough to ask you to measure it. However, he says he is surprised that no one has tried to sell rulers with this line marked. <wicked grin> There is always someone with something to sell to clutter up your sewing space and cause confusion. I say don’t give “them” any ideas!)
What if … we use an Upside-Down Ruler?
Here is a great tip for cutting an accurate, precise unprinted square for the 4 QST that will exactly match the 8 HST—with no math!
Inklingo quilters thrive on the precision of shapes that are accurate to at least 2 decimal places. You can see what I mean with the Triangles in the Index of Shapes. It is impossible to overstate the advantages of exact sizes.
I wanted a better way to determine the size to cut the square for the 4 QST for Flying Geese. Adding an approximation (1.25) to an exact measurement is not good enough—so I recommend an upside-down ruler, okay?
Seeing is believing . . .
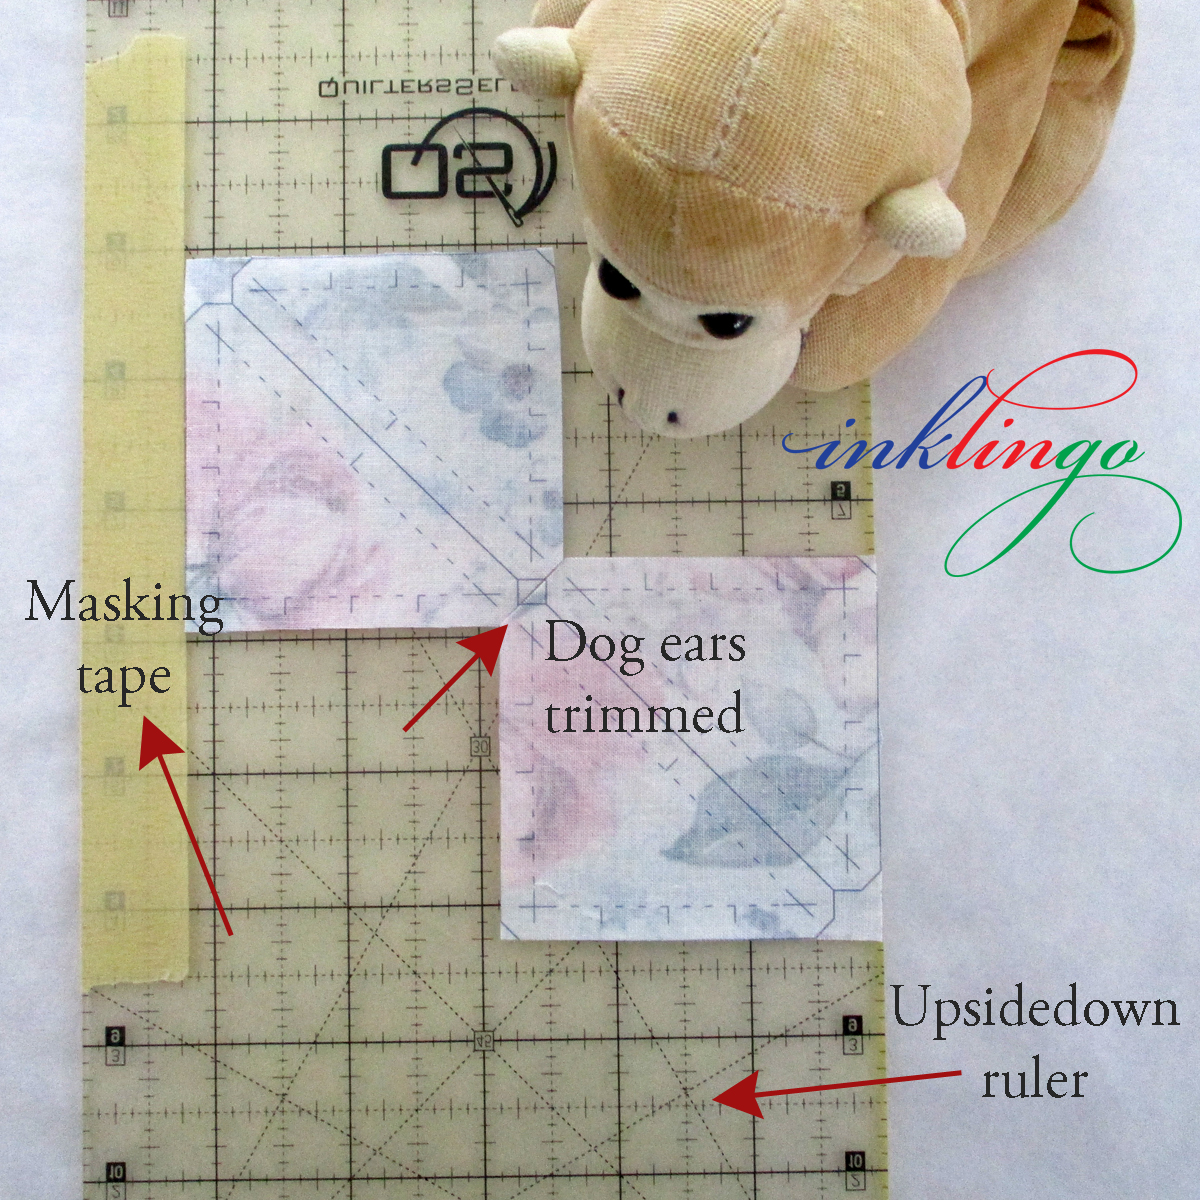
Upside Down Ruler and Ordinary Masking Tape
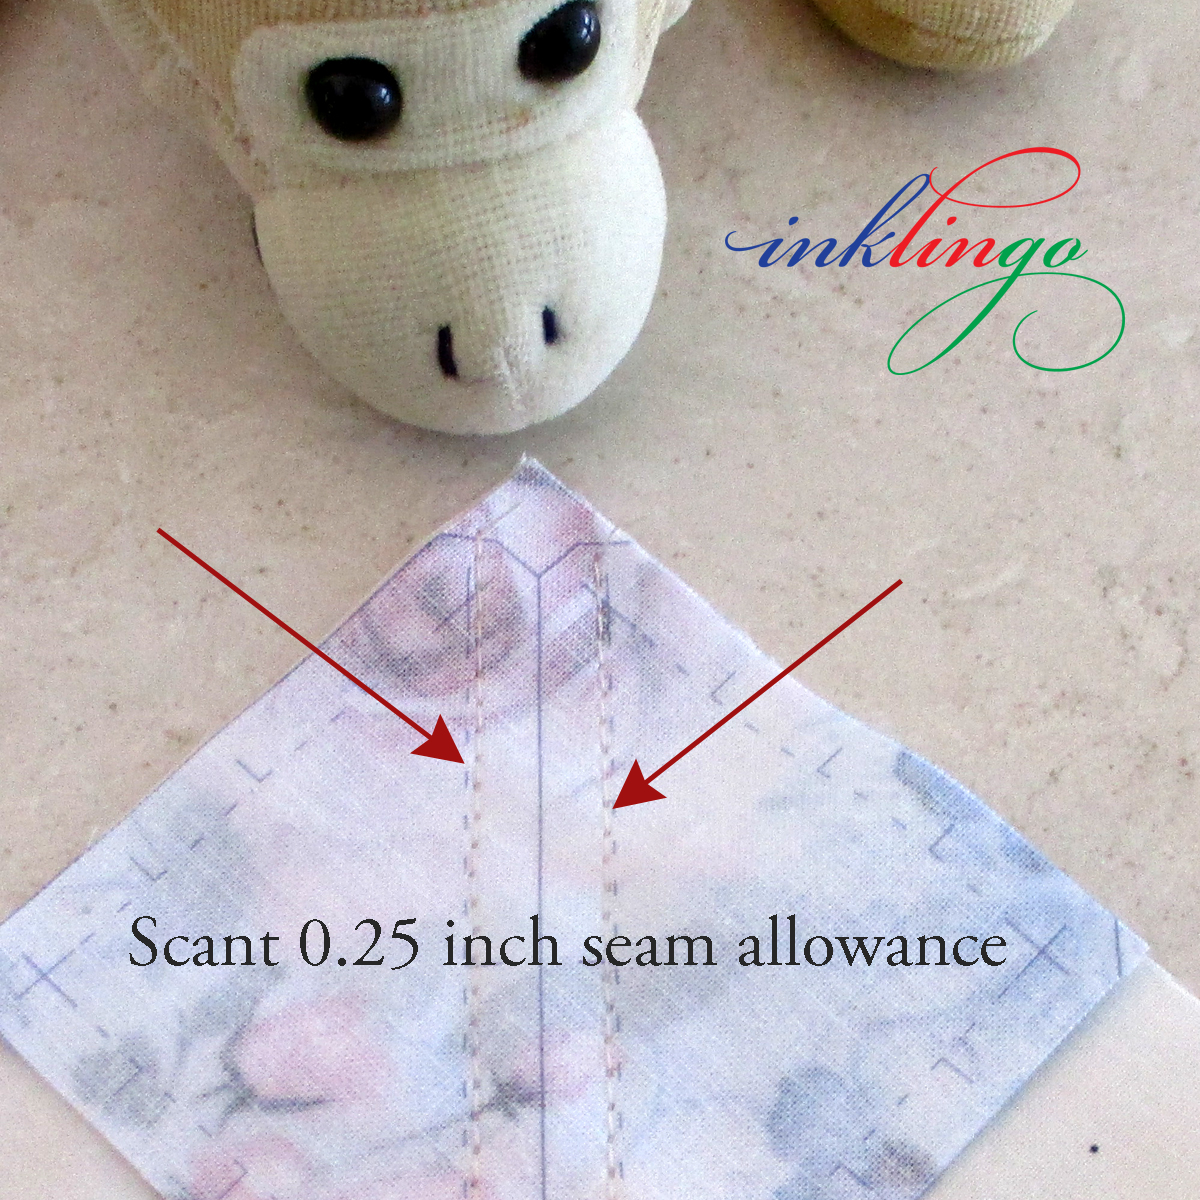
1. Print 8 HSTs and cut into squares, as usual. (Do not cut the individual triangles apart yet, as shown above.)
2. Trim the dog ears off at least one corner of all of the pairs of triangles.
3. Turn your acrylic ruler over so the wrong side is facing up and position 2 squares so the trimmed corners butt up against each other (above). Use the lines on the ruler to make sure everything is aligned in a square.
4. Position at least one layer of masking tape to mark the edge of the square.
In most cases, the masking tape will not fall exactly along one of the lines on the ruler. It marks a size that would be tricky to cut otherwise.
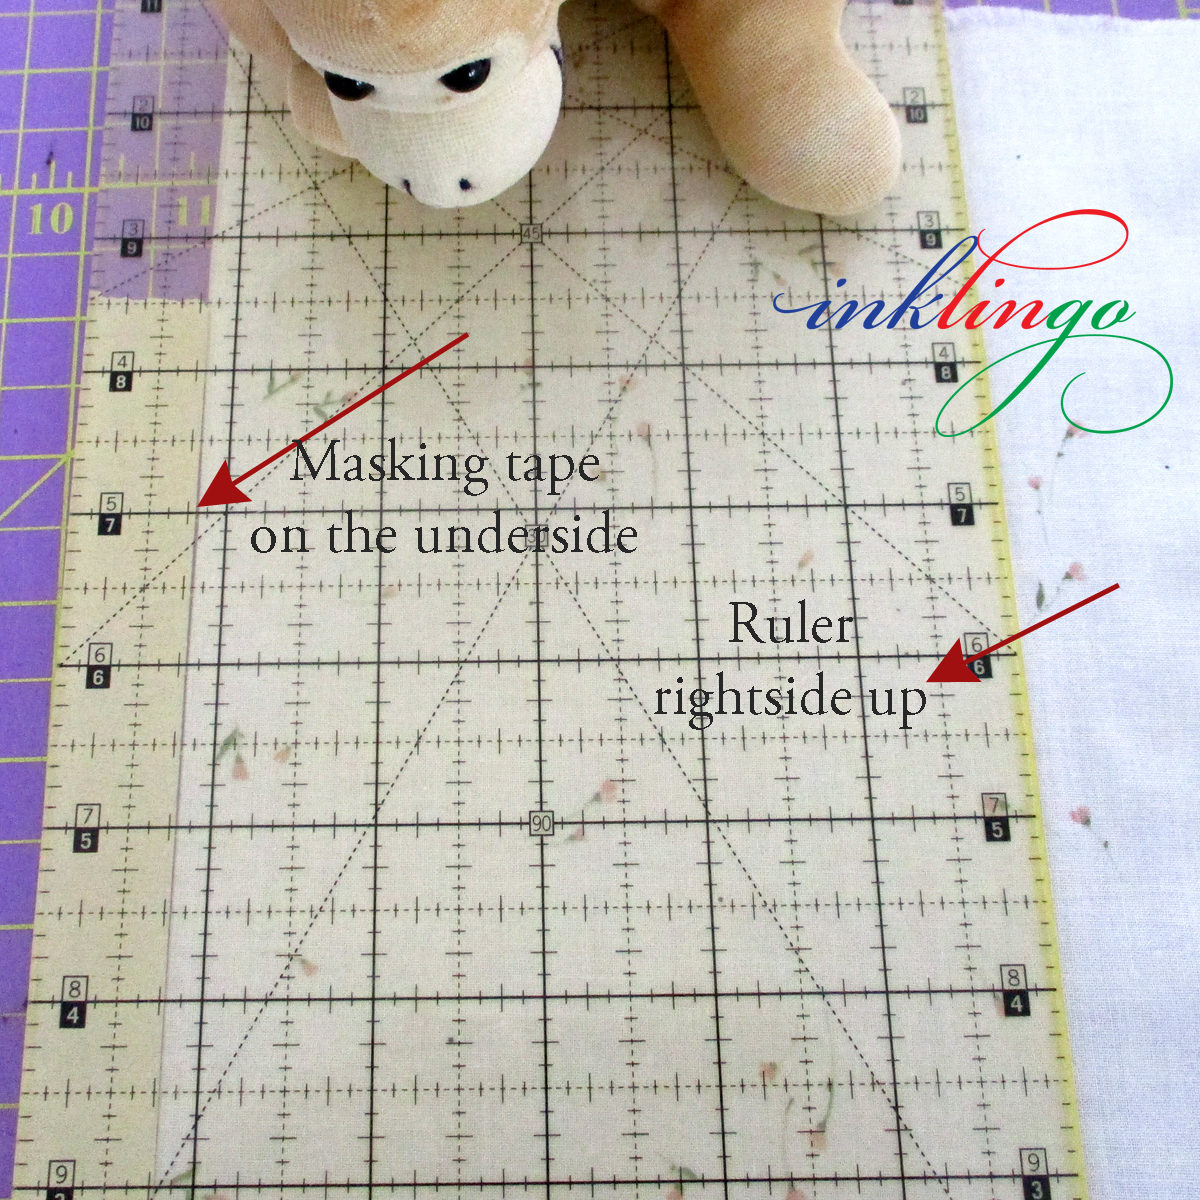
Now, you can flip the ruler over and use the masking tape to guide you in cutting fabric squares in the usual way—but absolutely precisely!
Turning your ruler upside down eliminates the need for arithmetic and is more accurate. It is almost the same as adding 1.25 inches, but more exact.
It works every time. It works for any size.
Every unit will be exactly the right size without trimming.
Jumping up and down is not the best way to press, but it is a great way to celebrate precision.
Just remember to turn that ruler upside down to position the masking tape, okay?
The HST 00B shape collection includes 12 sizes of Half Square Triangles. I bet you can hardly wait to try this! There are many more sizes available.
By the way, my new favorite rulers are from Quilters Select (No affiliation). The 8.5 x 24-inch size is ideal for cutting freezer paper, as we never need to cut it wider than 8.5 inches. (With narrower rulers, we sometimes need to use two rulers instead of one.)
New to Inklingo? Make Flying Geese with the free shapes!
1. DOWNLOAD, SAVE, and OPEN the Free Diamond Triangle Square shape collection first. You can use the free HSTs to make your first Flying Geese.
2. VISIT the Welcome Page on the website.
3. SUBSCRIBE for occasional updates.
Thank you for visiting!
Linda & Monkey

What a brilliant way to make the precise ways of Inklingo sewing even more precise! It is so easy to understand and will be so easy to accomplish that I’m now thinking about making some flying geese just for the fun of it! Thank you!!
I love seeing your comments, Cathi. Thank you for taking the time. Adding an approximation to an absolutely precise number has always bothered me. It felt really good to figure this out early in the morning last week. I often get my best ideas when I am semi-awake in the morning and I tell Russ it is a good reason to sleep in. (He likes sleeping in too. )
A nice video to come back to from my cruise…but I wish I were still on my cruise.
Cathie in Ut (who is in NC for a bit)
Hi changing email. Still love Inklingo
Hi Linda,
I have finished 100 Yin Yang blocks…yippee! I wonder what is the best way to sew them together. The middle of each side has MANY layers.
Any ideas?
Hugs Sweetie,
Frummie