I love my finger pincushions. They’re dainty and indispensable.
Machine or Hand
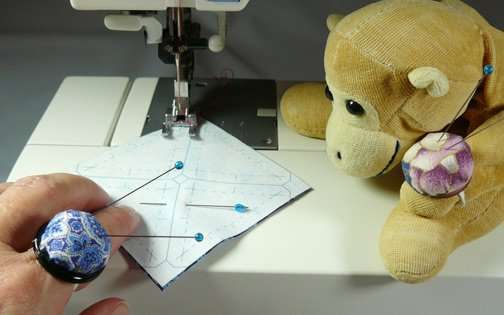
These are great for machine piecers (left), and hand piecing snobs (right).
They even work for lefties!
I wear a finger pincushion when I am machine piecing, when I am hand piecing, and sometimes when I am not sewing at all. (Ooops!)
If you forget to take one off when you leave the house, Monkey says you should try to wear one that matches your outfit.
They are fun to make, so there’s no excuse not having one to match.
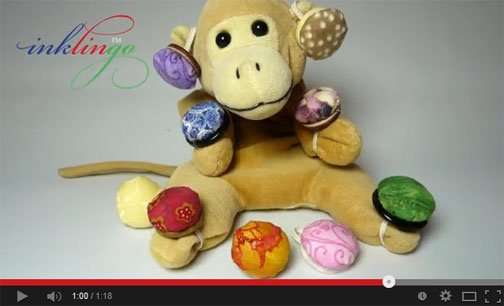
There are written instructions in a few Inklingo Shape Collections, but they are so simple you can probably just watch the movie (70 seconds).
1 minute how-to
What I used:
- scraps of cotton fabric
- Inklingo Circles – printed 1.5 inch circles on fabric (named with the finished size)
- rotary cutter and mat (Use scissors if you prefer.)
- quilting thread for a running stitch to gather the circles
- finger-sized spool of thread
- scraps of batting (Silk is v v nice.)
- 1/8 inch elastic
- tweezers to coax the elastic through little holes
- a bit of patience (see above)
- big buttons
- glue gun and hot glue
Russ listened to the William Tell Overture over and over again. (Licensed from Unique Tracks) It’s okay because he laughed when he saw the final result.
We have written about circles before, here.
You could WIN
Leave a comment before Tuesday March 6 to be in a drawing for one of my pincushions, okay? If you don’t win, you can make lots of finger pincushions for yourself and for friends anyway.
This was not on the official To Do list, but it was a nice break. Can you tell I was having fun?
We’ll be back soon with more about the winners in the EQ/Inklingo Love the Lines Contest too. Thanks for visiting.
Linda & Monkey
New to Inklingo? Order and download free shapes and start sewing in the next few minutes. Quick Start (Always FREE.) There are triangles, diamonds, and squares in the free collection—great for dozens of different blocks.


What a fantastic idea! Thanks for the video and the instructions.
Cute project! I like the suggestion of wearing one the matches your outfit in case you forget to take it off when you go out. 🙂
What a fantastic idea !!! I hope to win one !!!
Thanks to Bonnie too !
So cute! I have to make one or a dozen. Thanks.
Loved the video! I want your monkey! So glad Donna shared this on FB, the highlight of my day so far.
Saundra
aka, Donna’s neighbor
I totally love your tutorial – and your cute friend that helped. I have a retreat in April. I’m sure I could manage a few to give to friends… thanks very much!
Thank you so much for tute. Off to make one now (or maybe a few)
Thank you Linda for that! Thanks to Bonnie who sent me here! And the music is perfect!
Ooh, this looks like so much fun! I just have to try this. Thanks for the tutorial!
I just found your blog through Bonnie Hunter, these are just too cute. I am going to be a follower too.
These are adorable! I will be making them for all my quilty friends! Thanks for the tutorial! Oh, and Bonnie sent me! She’s so good!
I just LOVE that little pincushion! Monkey is cute, too! Thanks for the tutorial.
Yes, I suppose this would be so much better than leaving the pins on the bed of the machine to get pushed off onto the table or the floor! I must try one! (or win one would work too”)
Those are adorable. Video was a fun watch too. Thanks for sending me over Bonnie!
Love this idea! The button is so much better than the one with the soda bottle cap. Much lighter and easier to work with. Thank you for the tut(orial).
Those are neat! I’m going to make some….. maybe for my quilt bee.
I think I will try this method and see which I like best…I wish I had some lovely silk batting leftovers…I will have to call some of my long arm quilting friends and see if they have a few scraps just taking up room! LOL
Thanks so much for the tutorial. I’m going to make one for my sister. I’m sure she is going to love it. Heck I’ll make one for myself if I’m not lucky enough to win one.
Great idea and please keep them coming.
Thanks for sharing
SueW
Upstate Ny
Thank you for sharing how to make these. I will definitely be making one for me and then some for all my quilting friends.
This is my first visit to your site. Looks like a great place for some great tips! 🙂 LOVE the finger pin cushion and the music is so fun too! Thanks for sharing!
This is my first visit to your blog. Thanks for a easy and very fun tutorial. Cindi
Now that is so very cool, and looks easy enough that I could do it!! What a cute video, instructional and fun, and I love Monkey!!
Jenny in Florida
Whar a fabulous idea! Very handy, never thought of a finger pincushion!
Thanks Linda. I love my finger cushions. I plan to make some for an upcoming Quilt Til You Wilt!
Your tutorial had me giggling! Too cute and fun! Will have to make one, even if I win one!
What a very cool video. Love the pincushion 🙂
Wow! What fun. I think I will have to have grandchildren make these for presents for Christmas this year!! Put on a fast Christmas carol and see how many they can make. Thanks for the idea- of course, I’d love to have one to show first!
these are so cute! love em! they are definitely on my to do list.
What a great tutorial. I can’t wait to make a bunch to give as quick gifts. Thanks for the chance to win one!
Love the video — and the idea of a finger pin cushion. I’m addicted to my wrist cushion and this would even be more convenient, I think. I’ll have to dig out my button jar! Thanks so much. Jan
Totally awesome. Thanks for the idea! I cannot wait to try it.
ADORABLE! Loved the video and the little pin cushions! Would love to win one! 😉
Loretta
I LOVE the video, and I laughed out loud at Monkey with the pincushion earrings, etc. I may just have to go digging through my old button box to see if I can find any big buttons!
Oh, how fun! These would make such quick and easy gifts! Pretty and useful, too!
What a great idea! Pins right where you need them. Might try making this but would love to win one. Thanks!
Great video, I really enjoyed it. I love diamond rings but I have more need for one of these. Wonderful idea! I know what I’ll be doing tomorrow. I’ll be going thru my button jar. Thank you, I love quick fun crafts. ;-> Toni Anne
Monkey has found his niche! Love the pin cushions and will make some when we get home from Florida. Thanks, Linda and Russ
Your little movie got me motivated…thanks for helping to boost my mood, and my evening! Cute.
Cute idea and very cute monkey
These are adorable! Thanks for sharing!
What a talented monkey! We have a sock monkey who lives at our house but he has never made a pincushion. Gail
Cute tute! Love the music.
I’m a fan and a STILL DJ Slacker but..have great intentions of someday..sigh. The tutorial is too funny. Glad to see that Monkey is not worn out. Really neat tutorial and liked the music too.
Thanks for sharing. Really cool 🙂
These are soooo cute! I have never seen them before. I think I will make one for each of our quilt group-the ladies would be so surprised! Thanks for sharing this neat idea!
thank you, thank you. really neat…….
Love the finger pincushions. These will make great little surprise gifts for my quilting friends!
I love this idea – so easy to do! And Monkey just adds more inspiration! Love it!
This is a really cute idea. It would be fun to make one for all my friends. The tutorial video was fun to watch. Your ideas are amazing.
Great idea. Thanks to Bonnie for sending us here. Must raid my button box now..Merci